An auto scaling group contains a logical collection of VM instances that share the same usage scenarios for the purposes of automatic scaling and management. With an auto scaling group, auto scaling or elastic self-health services can be automatically achieved based on business changes.
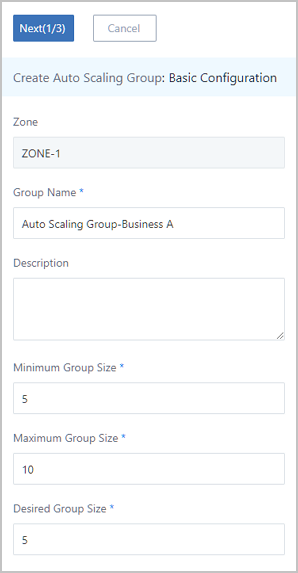
In the navigation pane of the ZStack Private Cloud UI, choose . On the Auto Scaling Group page, click Create Auto Scaling Group. On the displayed Create Auto Scaling Group page, create an auto scaling group.
To create an auto scaling group, follow these steps:
 Note:
Note: 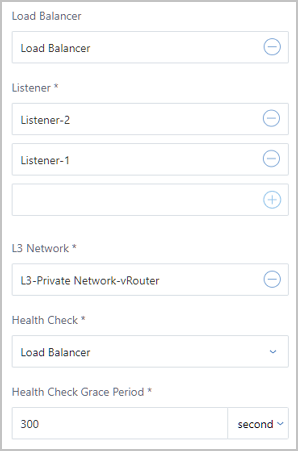 Note: Currently, our auto scaling service offers autoscaling capabilities that let you automatically add or delete VM instances in the scenarios such as vRouter network and VPC network.
 Note:
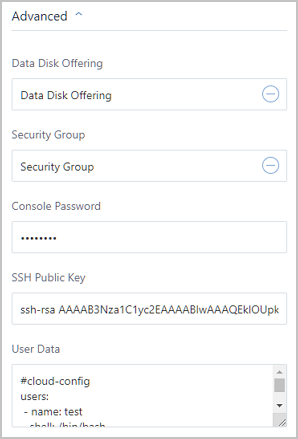
Note: #cloud-config users: - name: test shell: /bin/bash groups: users sudo: ['ALL=(ALL) NOPASSWD:ALL'] ssh-authorized-keys: - ssh-rsa AAAAB3NzaC1LXCJfjroD1lT root@10-0-0-18 bootcmd: - mkdir /tmp/temp write_files: - path: /tmp/ZStack_config content: | Hello,world! permissions: '0755' hostname: Perf-test disable_root: false ssh_pwauth: yes chpasswd: list: | root:word expire: False runcmd: - echo ls -l / >/root/list.shecho ls -l / command.#cloud-config write_files: - encoding: b64 content: NDI= path: C:\b64 permissions: '0644' - encoding: base64 content: NDI= path: C:\b64_1 permissions: '0644' - encoding: gzip content: !!binary | H4sIAGUfoFQC/zMxAgCIsCQyAgAAAA== path: C:\gzip permissions: '0644'The preceding sample script can achieve the following functionalities: When the VM instance boots, three files: b64, b64_1, and gzip are created in the C drive.
Note: When you use User Data, note that you can configure only one L3 network for an L2 network.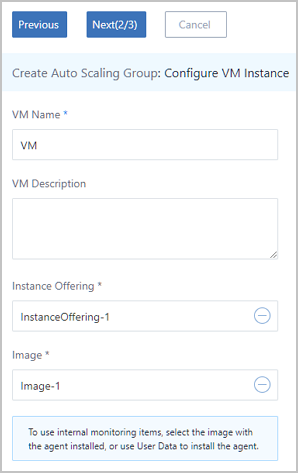
 Note:
Note: Exercise caution. If you delete resources (such as instance offering, image, and network) in the template configurations, you will fail to create the auto scaling group.
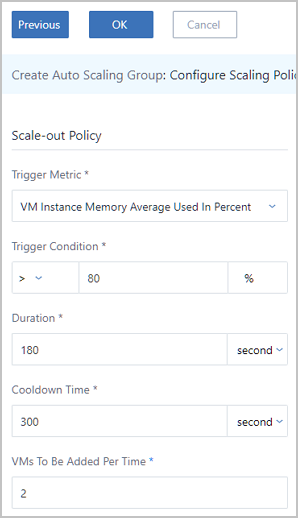
For example, when the average memory utilization of all VM instances in the auto scaling group is detected to continuously exceed 80% within a period of time, an appropriate number of VM instances will be automatically created. Hence, the auto scaling group will regain the reasonable load balancing.
Note: Note: Each time the minimum allowed scale-out number of VM instances is 1. If the value is too large in this field, the scale-out activity will fail.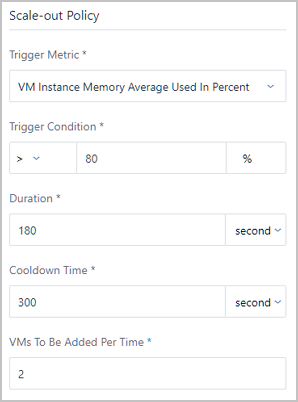
For example, when the average memory utilization of all VM instances in the auto scaling group is detected to continuously drop below 20% within a period of time, an appropriate number of VM instances will be automatically removed. Hence, the auto scaling group will regain the reasonable load balancing.
Note: Each time the minimum allowed scale-in number of VM instances is 1. If the value is too large in this field, the scale-in activity will fail.
 Note:
Note: Exercise Caution. Deleting an auto scaling group will delete all VM instance in the auto scaling group as well.
Method: Go to , locate Health checking interval of loadBalancing VM instance, and set a value as needed. Default value: 10. Unit: Second. Minimum value: 10 seconds. Maximum value: 1000 seconds.
Method: Go to , locate Health checking threads of loadBalancing VM instance, and set a value as needed. Default value: 10. Minimum thread count: 10. Maximum thread count: 1000.
Method: Go to , locate Interval for remove unhealthy instance in group, and set a value as needed. Default value: 30. Unit: Second. Minimum value: 10 seconds. Maximum value: 1000 seconds.
Method: Go to , locate Threads limitation for Unhealthy thread instance, and set a value as needed. Default value: 10. Minimum thread count: 10. Maximum thread count: 1000.
Method: Go to , locate Checking interval for instance count in group, and set a value as needed. Default value: 20. Unit: Second. Minimum value: 10 seconds. Maximum value: 1000 seconds.
© 2023, Shanghai Yunzhou Information and Technology Ltd (云轴科技). All Rights Reserved.
Back to Top
Email Us
contact@zstack.ioEmail Us
contact@zstack.ioEmail Us
contact@zstack.ioThe download link is sent to your email address.
If you don't see it, check your spam folder, subscription folder, or AD folder. After receiving the email, click the URL to download the documentation.Thank you for using ZStack products and services.
Submit successfully.
We'll connect soon.Thank you for using ZStack products and services.

