ZStack supports IPv4 flat networks, IPv6 flat networks, and public networks. This section describes basic deployments of IPv4 flat networks and IPv6 flat networks.
IPv4, known as Internet Protocol version 4 which defines IP addresses in a 32-bit format, is the most popular Internet Protocol version across the globe. ZStack flat networks support the IPv4 protocol. This topic mainly describes the basic deployment of IPv4 flat networks.
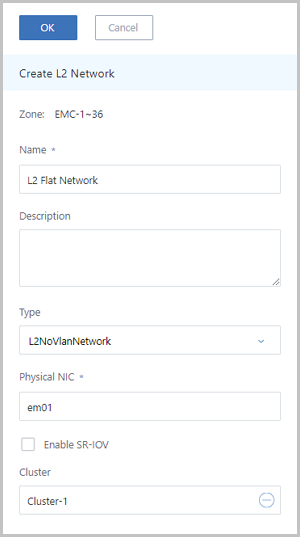
| Flat Network | Configurations |
|---|---|
| NIC | em01 |
| VLAN ID | non-VLAN |
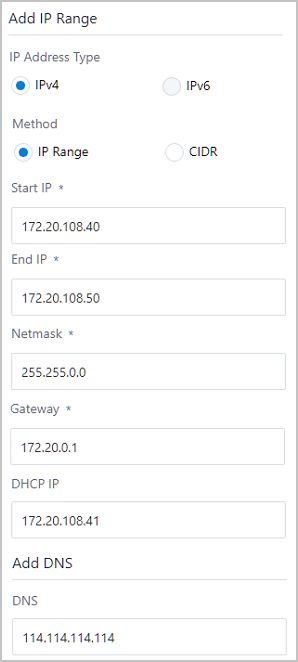
| IP range | 172.20.108.40-172.20.108.50 |
| Subnet mask | 255.255.0.0 |
| Gateway | 172.20.0.1 |
| DHCP IP | 172.20.180.41 |
 Note: Note: ZStack supports two types of IP addresses: IPv4 and IPv6. A network range can be IP range or CIDR. For the purpose of this Tutorial, IPv4 address and IP range are taken as an example.Note:
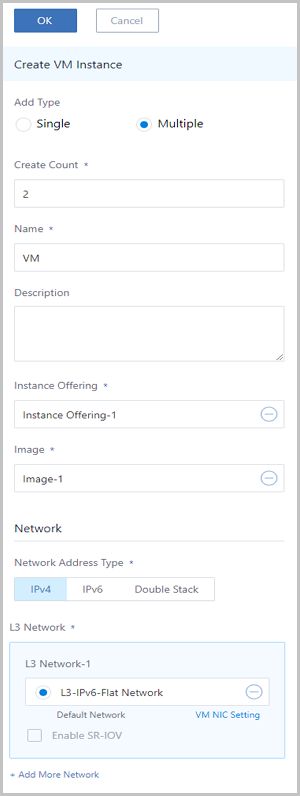
 Note: To create VM instances in bulk, select Multiple, and enter the VM count.
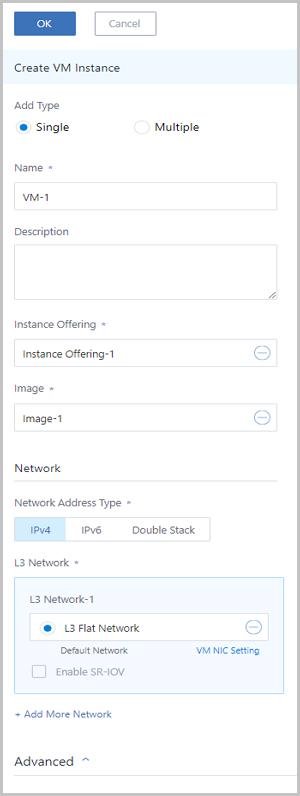
Similarly, use the flat network to create another VM instance, such as VM-2.
Expected result: The two VM instances (such as VM-1 and VM-2) on the same network range can communicate with each other.
ping VM-2, as shown in VM-1 Pings VM-2.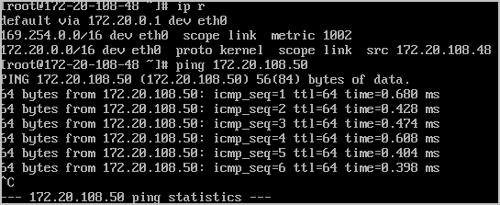
ping VM-1, as shown in VM-2 Pings VM-1.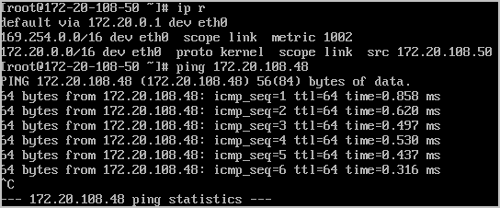
So far, we have introduced the basic deployments of the IPv4 flat network.
IPv6 is Internet Protocol version 6 that defines IP addresses in a 128-bit format. IPv6 resolves the long-anticipated problem of IPv4 address exhaustion, so many devices can be connected to the Internet. ZStack flat networks support the IPv6 protocol. This topic describes the basic deployment of IPv6 flat networks.
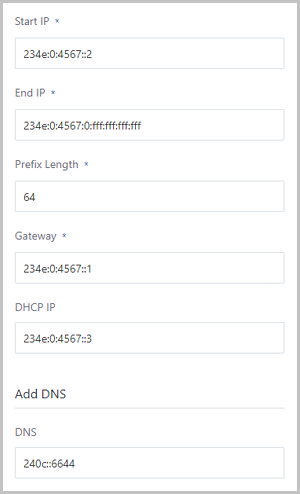
| Flat Network | Configurations |
|---|---|
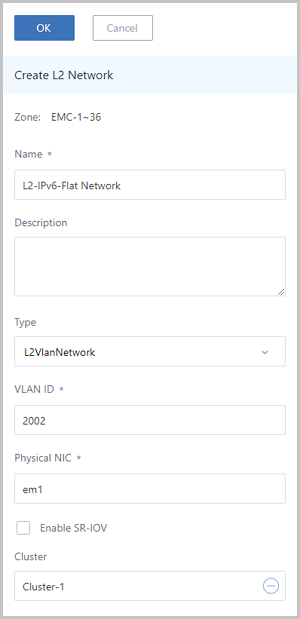
| NIC | em1 |
| VLAN ID | 2002 |
| IP Range | 234e:0:4567::2-234e:0:4567:0:ffff:ffff:ffff:ffff |
| Prefix length | 64 |
| Gateway | 234e:0:4567::1 |
| DHCP IP | 234e:0:4567::3 |
| DNS | 240c::6644 |
 Note: Note: IPv6 supports IP Range and CIDR. The following are the supported formats:Note: IPv6 supports the following IP allocations:Note:
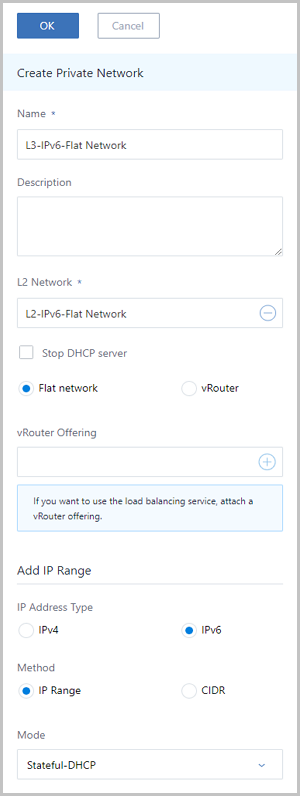
-bash-4.2# dhclient -6 eth0 # eth0 is the NIC name.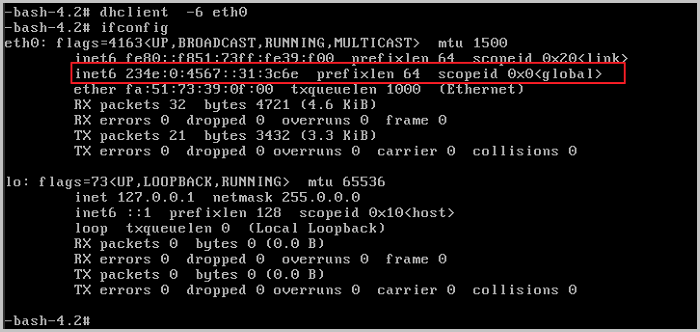
Expected result: The two VM instances (such as VM-1 and VM-2) on the same network range can communicate with each other.
ping VM-2, as shown in VM-1 Pings VM-2.
ping VM-1, as shown in VM-2 Pings VM-1.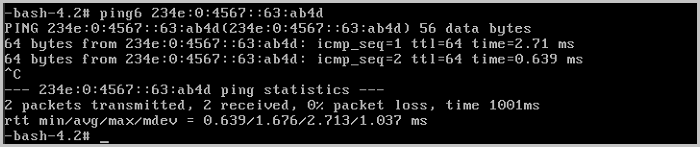
So far, we have introduced the basic deployments of the IPv6 flat network.
© 2023, Shanghai Yunzhou Information and Technology Ltd (云轴科技). All Rights Reserved.
Back to Top
Email Us
contact@zstack.ioEmail Us
contact@zstack.ioEmail Us
contact@zstack.ioThe download link is sent to your email address.
If you don't see it, check your spam folder, subscription folder, or AD folder. After receiving the email, click the URL to download the documentation.Thank you for using ZStack products and services.
Submit successfully.
We'll connect soon.Thank you for using ZStack products and services.

