This chapter mainly describes the installation and upgrade process of ZStack 3.10.0.
 Note:
Note: This documentation mainly describes how to install c76 ISO. Note that the basic steps for installing c74 ISO and c76 ISO are almost the same.
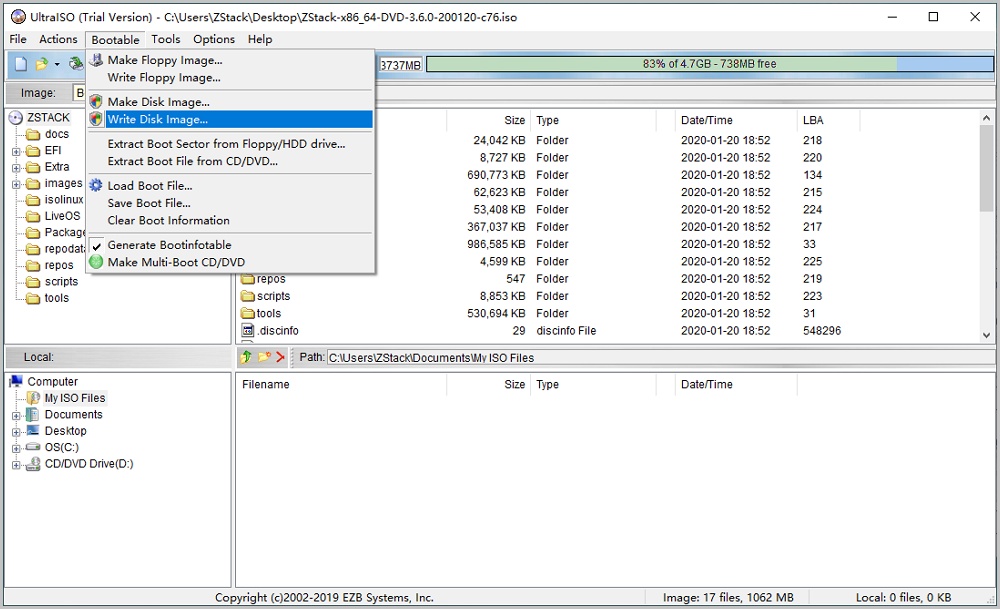
Note: After you download the installation package, confirm the integrity of the file by using the MD5 checksum tool.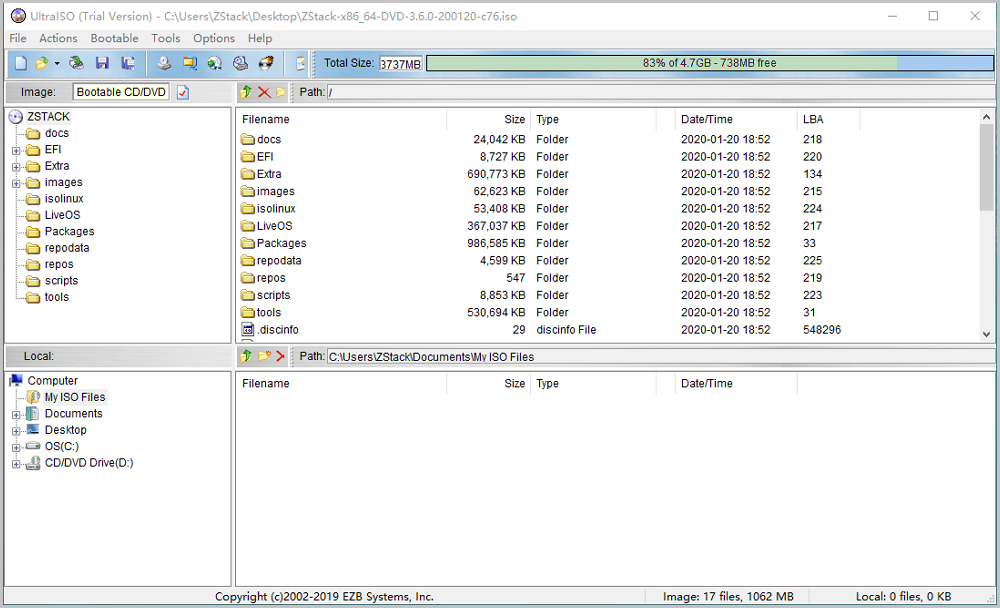
 Note:
Note: 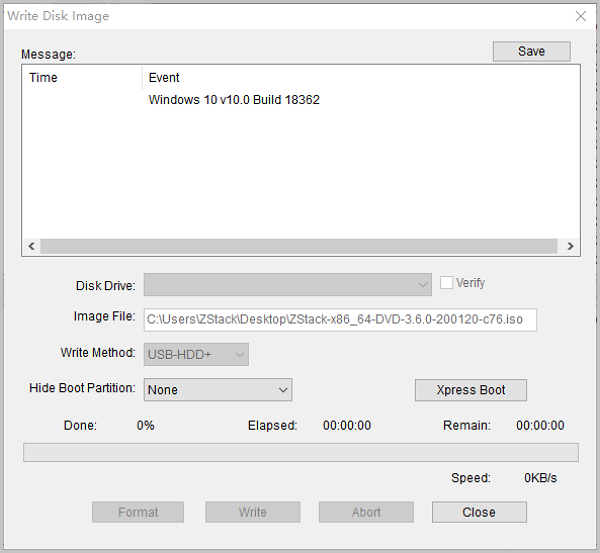
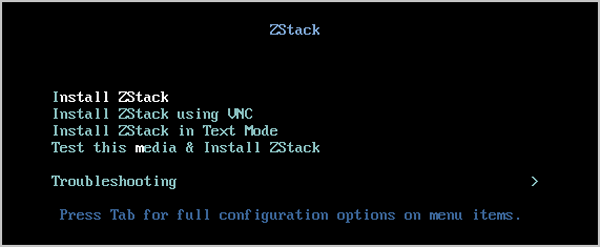
On the ISO installation page, the Install ZStack option is selected by default, and then the operating system starts to install, as shown in USB Drive Guide Page.
 Note:
Note: 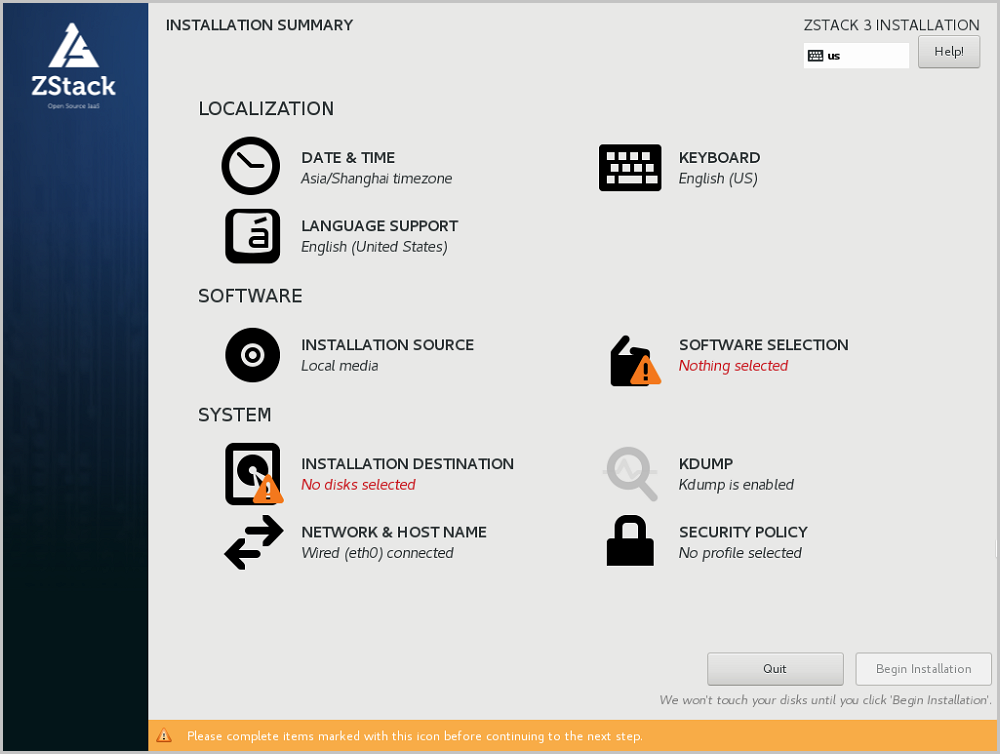
 Note: We recommend that you select this mode for the initial installation.Note: If you select No ZStack Local Repo on the right, the ISO will not be copied and no internal repositories will be produced. This saves the installation time efficiently.
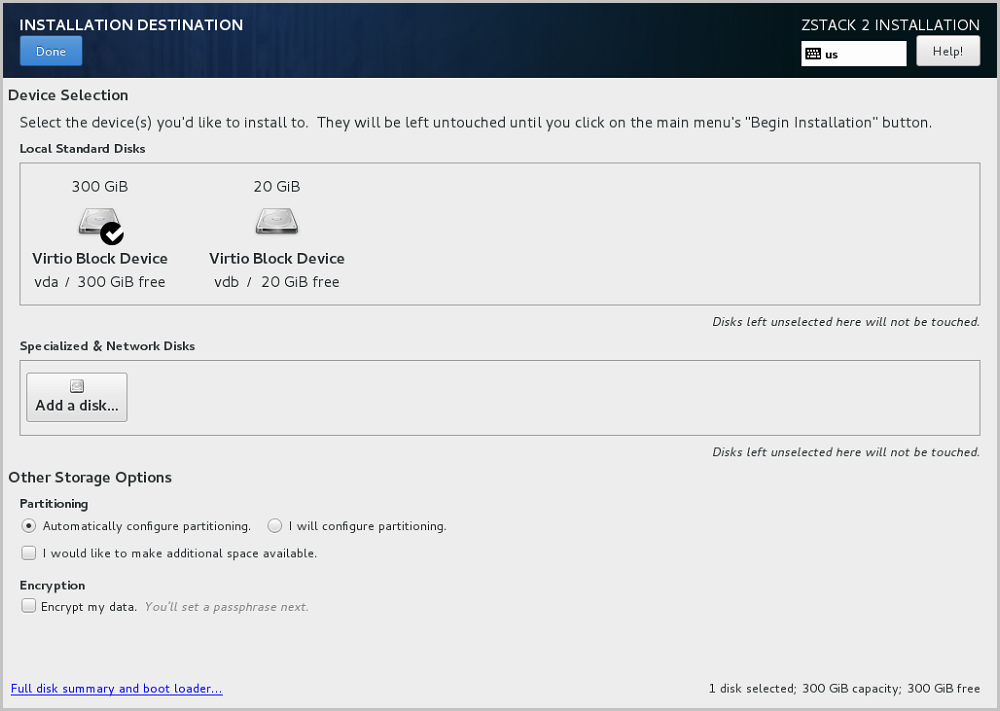 Note: When you install the OS, we recommend that you select only the hard disk or disks that are required by the system disk. You are not advised to select the hard disks that have special usage.
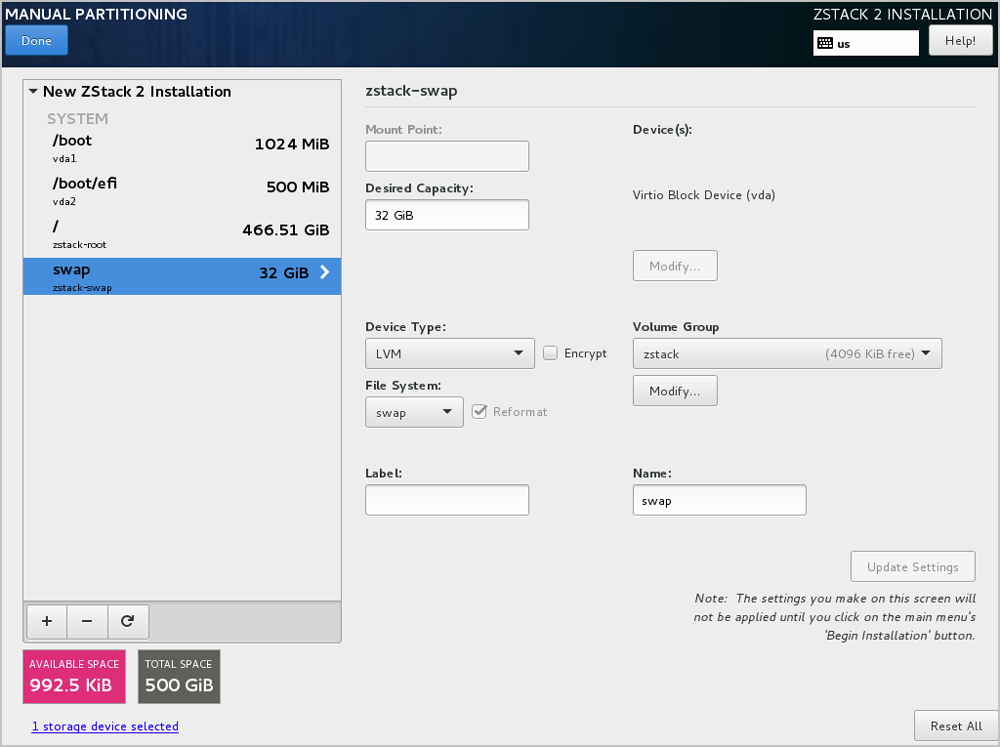
Default setting: Automatically configure partitioning. We recommend that you use the default setting to automatically configure the disk partitioning.
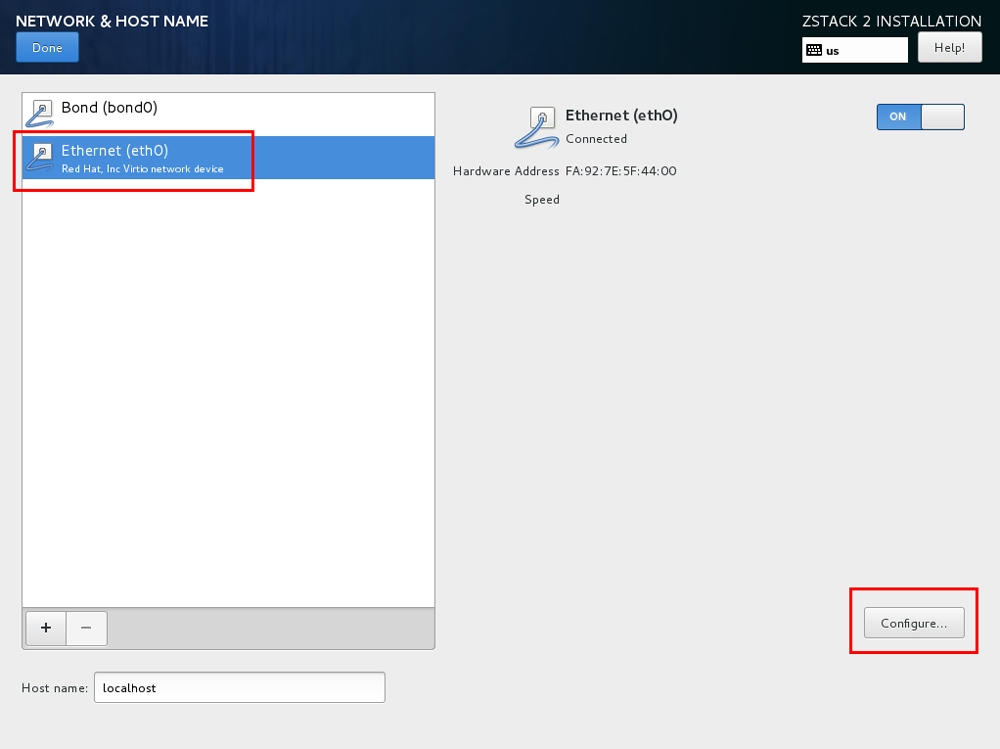
If you install and deploy ZStack in your actual production environment, we recommend that you perform network bonding. This is because network bonding can improve the network bandwidth and network reliability. For more information about the network bonding procedure, see Network Bonding.
For POC testing, you can proceed without network bonding.
This topic mainly describes the configuration method of the network bonding. If you want to install and deploy ZStack in your real production environments, we recommend that you use the network bonding method to configure your networks. If you use the cloud for POC test only, skip this topic.
The network bonding has the following two configuration methods: command line and TUI.
# Create a link aggregation virtual interface according to the LACP mode. zs-bond-lacp -c [bond-name] zs-bond-lacp -c bond0 # Create another link aggregation virtual interface according to the active-backup mode. zs-bond-ab -c [bond-name] zs-bond-ab -c bond0 # Bind the physical interface to the link aggregation interface. zs-nic-to-bond -a [bond-name] [nic-name] zs-nic-to-bond -a bond0 eth0 # Create a VLAN interface. zs-vlan -c [nic-name] [vlan] zs-vlan -c bond0 10 # Create a network bridge, and configure the network IP address for the network bridge. zs-network-setting -b [interface] [ipaddress] [netmask] [gateway] zs-network-setting -b bond0.10 192.168.1.10 255.255.255.0 192.168.1.1
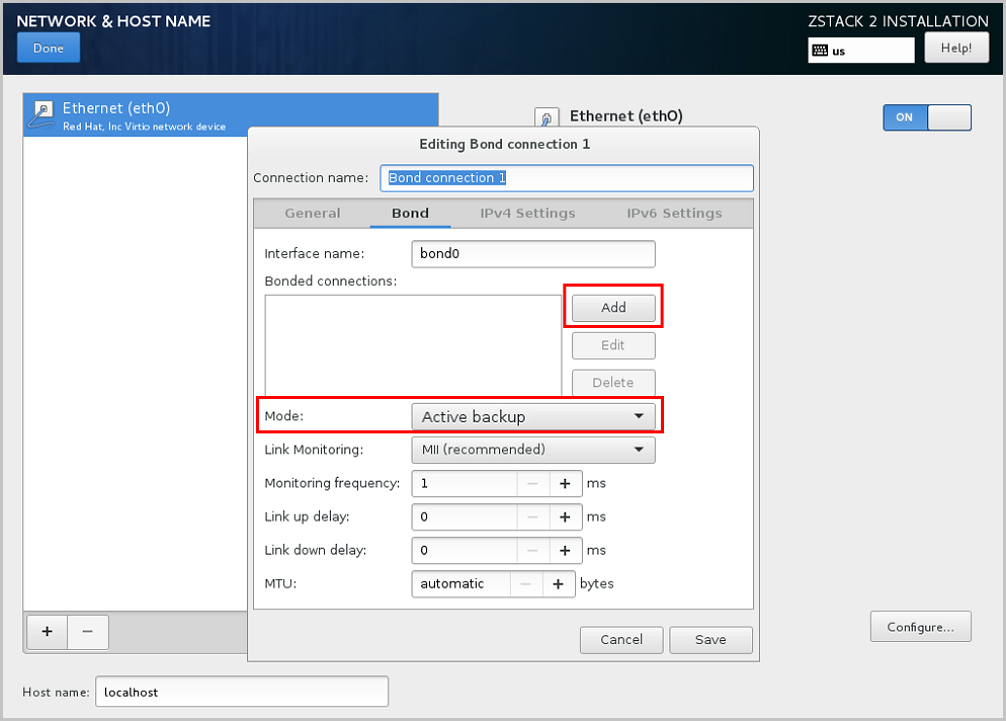
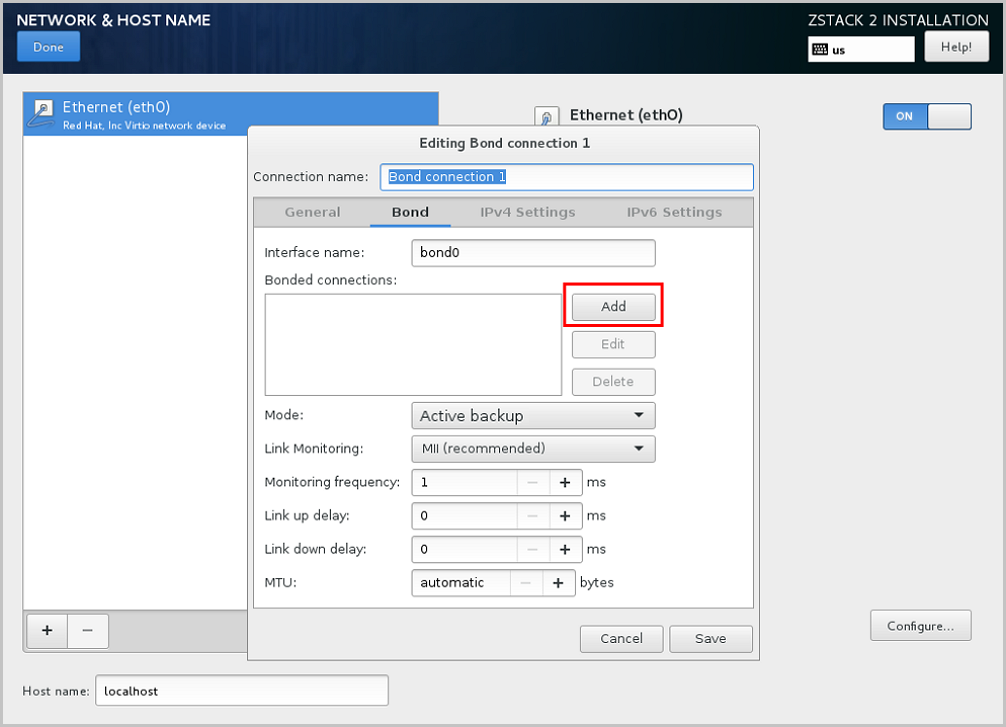

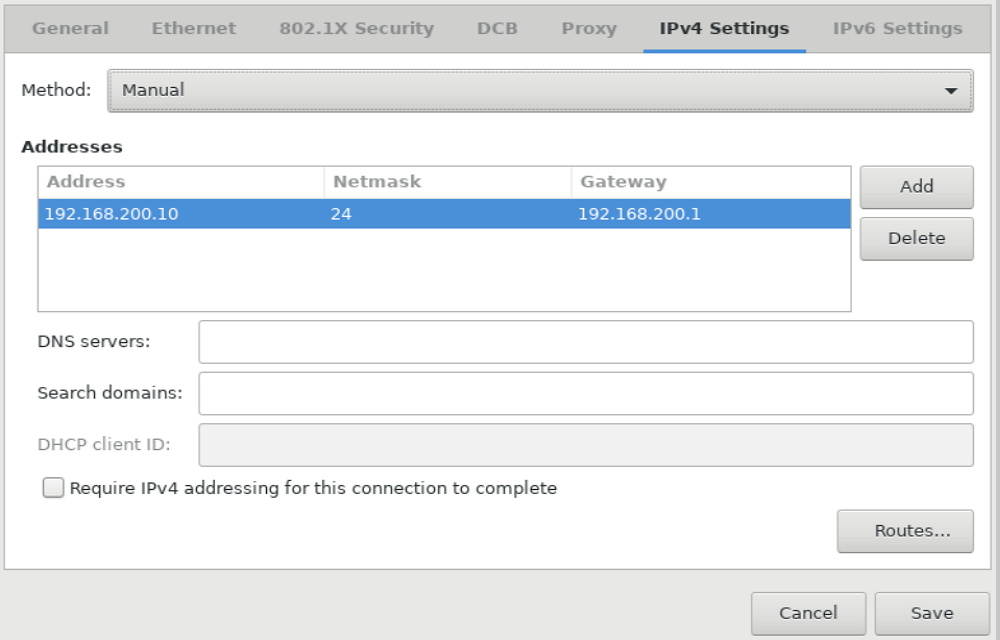
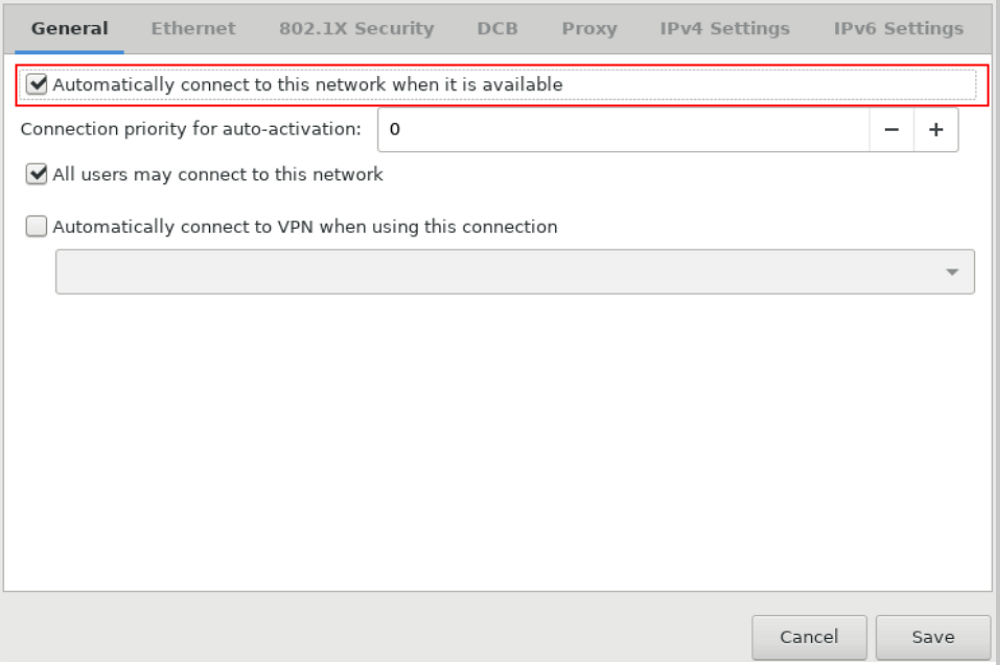
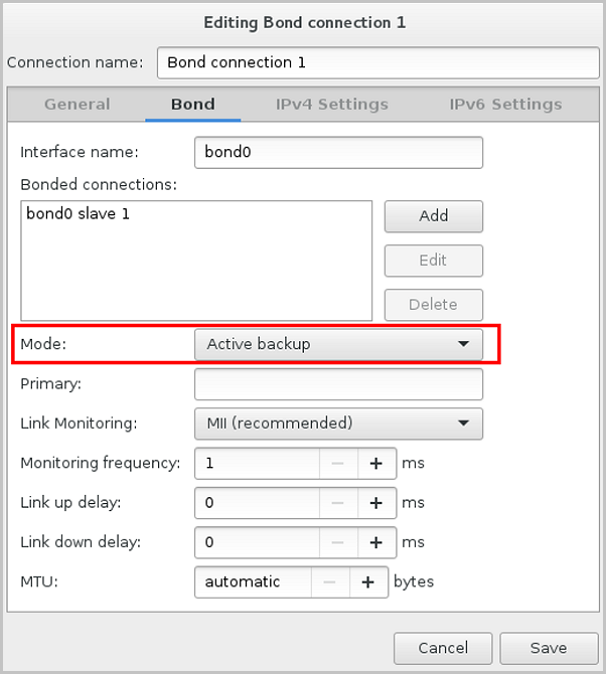
From the Mode drop-down list of the Bond tab, select the Bond mode as need, such as Active backup. On the Bond tab, you can use the default settings or customize your settings as needed. Finally, click Save, as shown in Select Bond Mode.
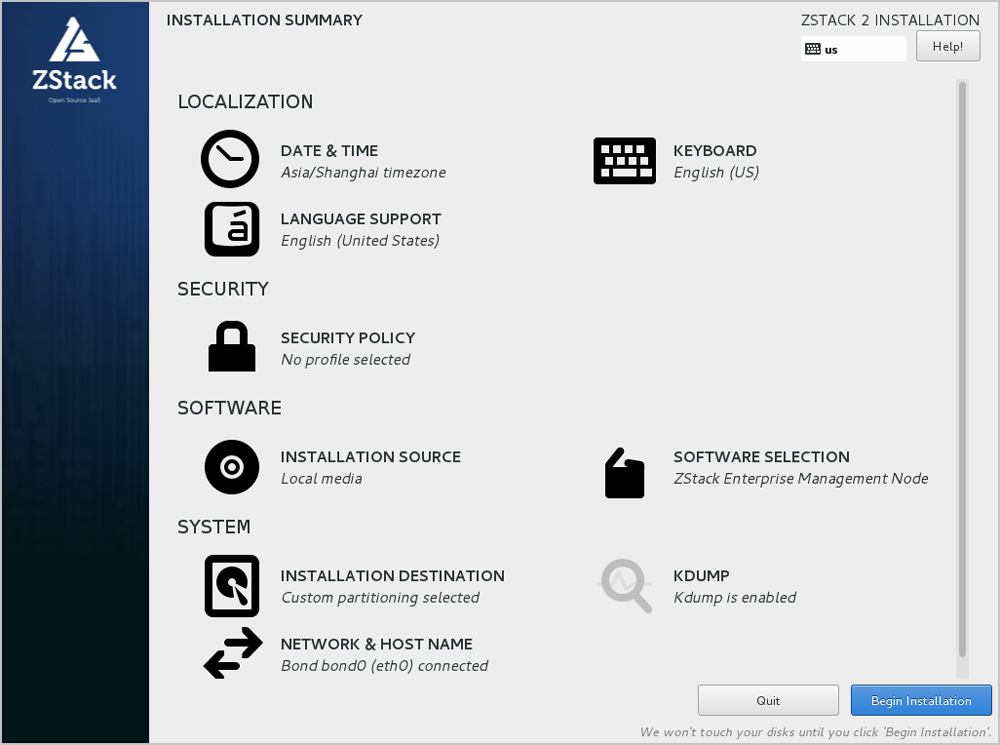
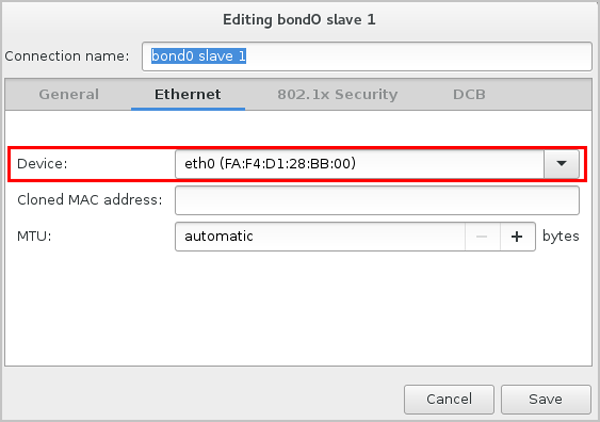
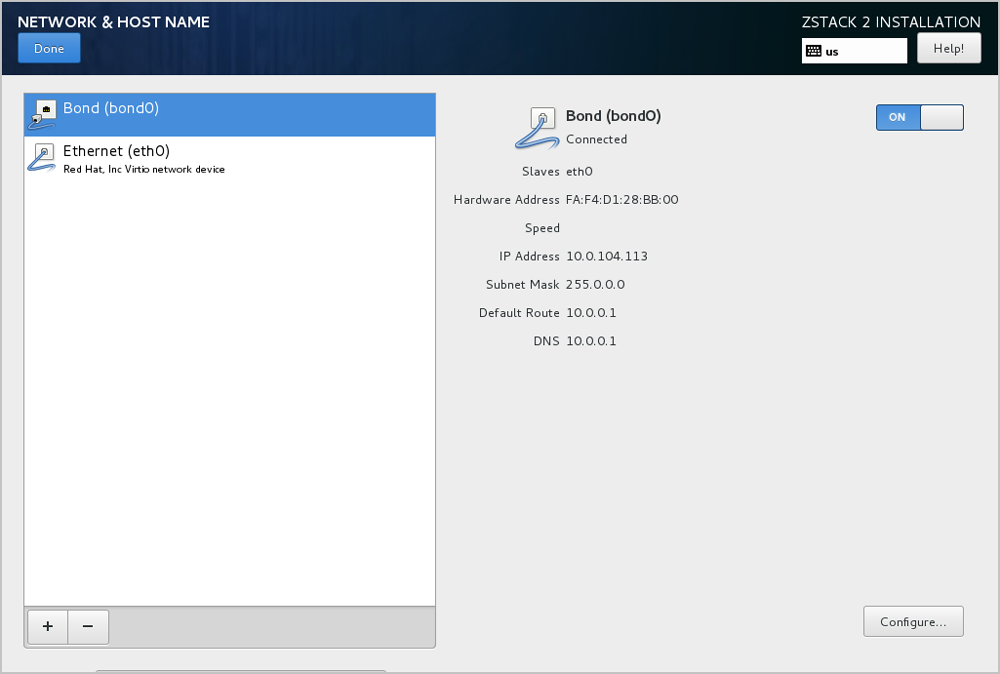
As shown in Complete Network Bonding.
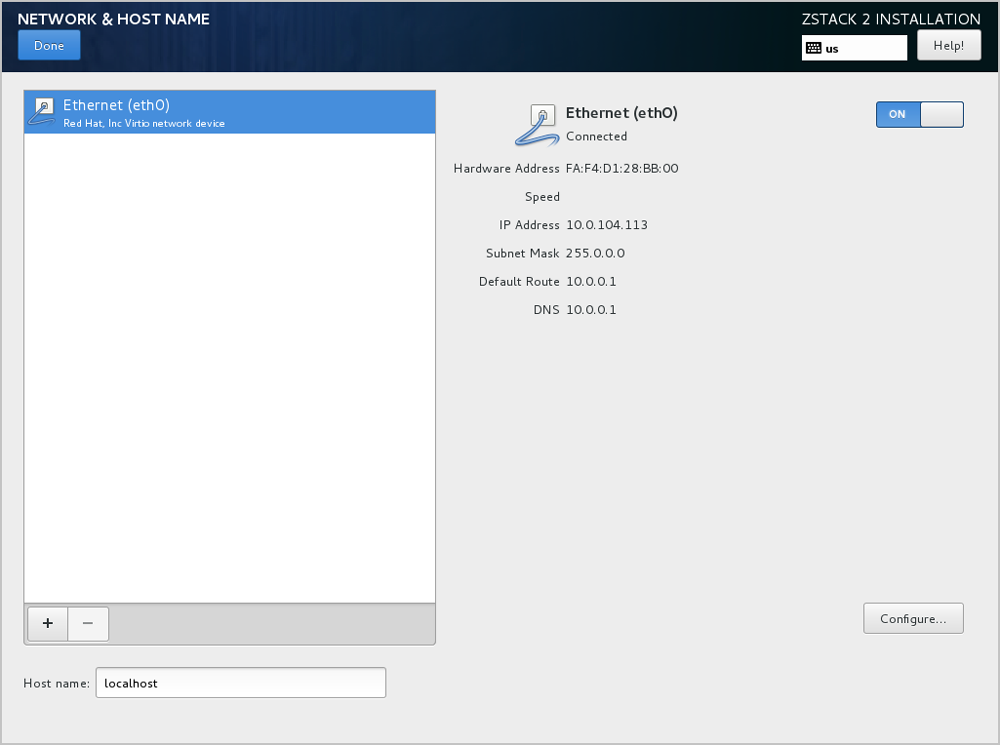
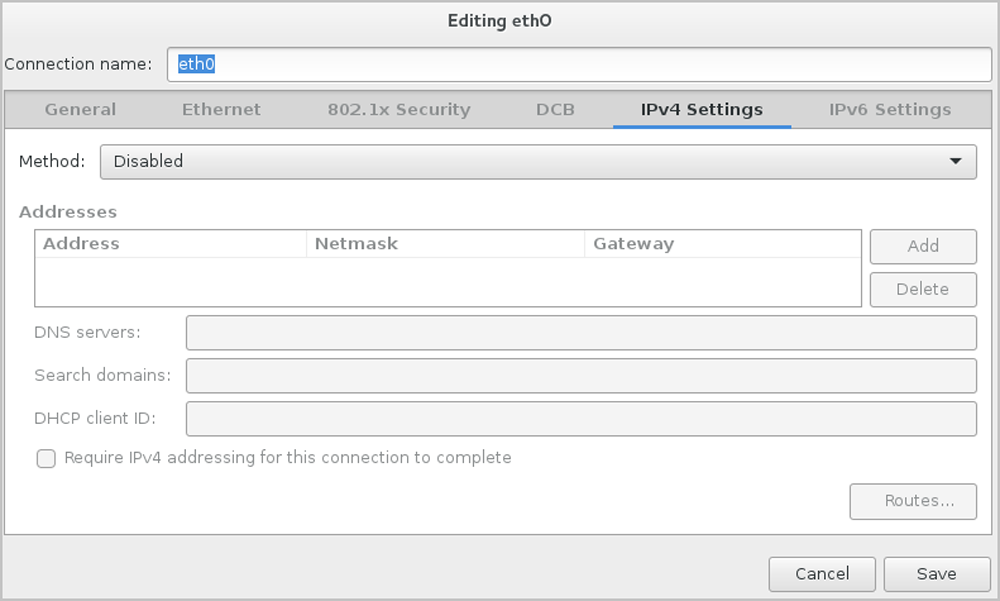
Note: To check Bond configuration options, verify that you have selected On and configured the IP address. At the same time, make sure that Bond Slave such as eth0 has been enabled by selecting On. Or otherwise, you might fail to install ZStack properly.
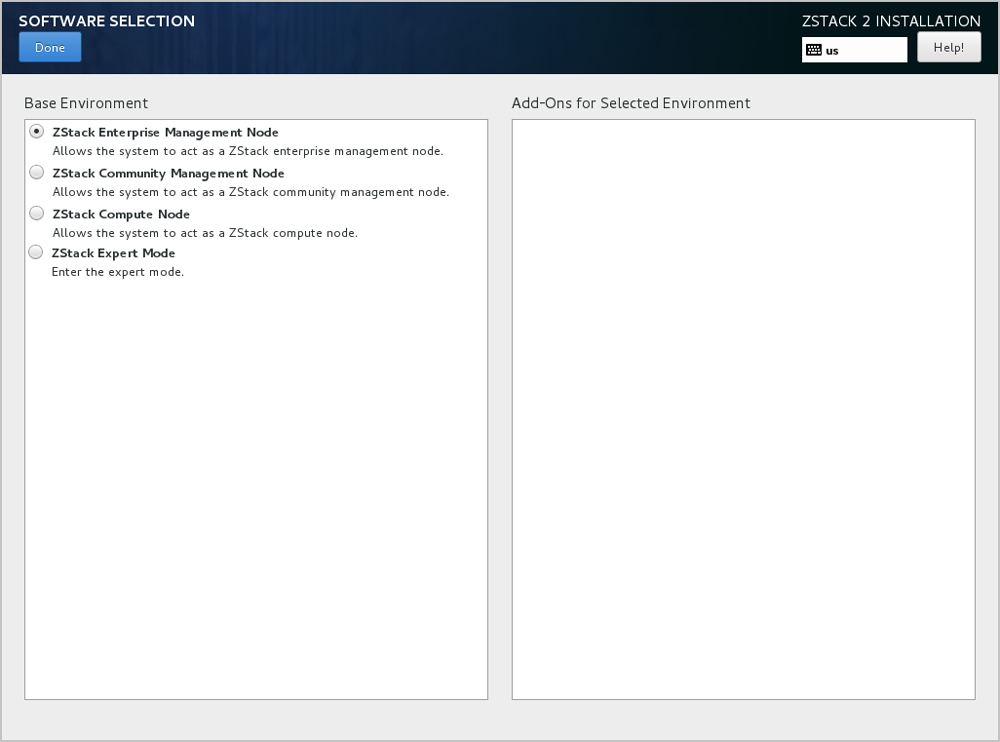
This topic mainly describes four installation modes of ZStack 3.10.0 and the TUI features.
To uniformly display on the TUI, operations such as configuring passwords for servers, configuring networks, and rebooting servers are ripped out from the UI.
For this feature, you can lower the maintenance difficulties of hosts. In addition, you can protect the internal configurations of the hosts from being damaged.
You can enter the command line mode by pressing Ctrl + Alt + F2, and exit the mode by pressing Ctrl + Alt + F1. In addition, you can enter the reserved terminal by pressing Ctrl + Alt + F11 to run common commands. Exercise caution when you use the terminal. Doing so may damage the system and influence the running ZStack services.
Note: Note: 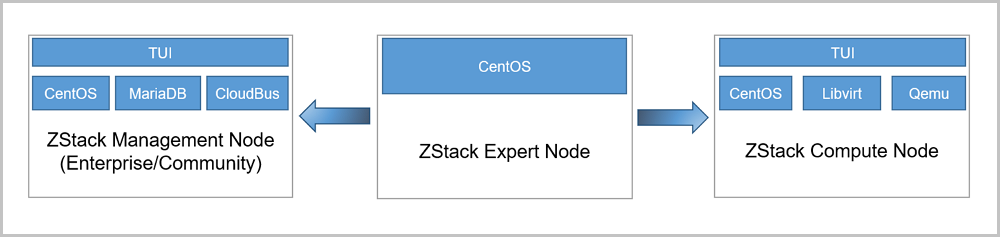
| Mode | Scenario |
|---|---|
| ZStack Enterprise Management Node | Only applies to install ZStack Enterprise Management Node. |
| ZStack Community Management Node | Only applies to install ZStack Community Management Node. |
| ZStack Compute Node | Applies to install other nodes apart from the management node in the cloud. For example,
|
| ZStack Expert Node |
© 2023, Shanghai Yunzhou Information and Technology Ltd (云轴科技). All Rights Reserved.
Back to Top
Email Us
contact@zstack.ioEmail Us
contact@zstack.ioEmail Us
contact@zstack.ioThe download link is sent to your email address.
If you don't see it, check your spam folder, subscription folder, or AD folder. After receiving the email, click the URL to download the documentation.Thank you for using ZStack products and services.
Submit successfully.
We'll connect soon.Thank you for using ZStack products and services.

