Quick Start with Tenant Management

Tenant Management module is the office automation (OA) system provided by ZStack Cloud. It supports basic features such as organization, user, and project management. In the mean time, it also offers advanced features such as 3rd-party authentication, ticket management, and independent zone management. This scenario takes basic features as an example to introduce you the quick start guide for Tenant Management.

The example use case is as follows:
  1. The admin creates an organizational tree.
  2. The admin creates users and adds users to the corresponding organizational structure
  3. The admin specifies the department admin.
  4. The admin shares basic resources globally.
  5. The admin creates a project and designates project admin.
  6. The project admin creates a custom role.
  7. The project admin adds members and attaches roles to the project members.
  8. Log in to the Cloud.
Assume the customer scenario as follows :
  1. The company consists of two subsidiaries that are in Beijing and Shanghai, and they need to create organizational trees respectively. The list of organizational structure is as follows:
    Table 1. List of Organizational Structure
    Organization Sub-department
    Company-BJ Sales-BJ
    Company-SH Dev-SH
    QA-SH
  2. The list of department admin is as follows:
    Table 2. List of Department Admin
    Department Department Admin
    Company-BJ Tomas
    Sales-BJ Ben
    Company-SH Frank
    Dev-SH Tom
    QA-SH Bill
  3. The user list is as follows:
    Table 3. User List
    Name User Name Password Department
    Tomas Tomas password Company-BJ
    Ben Ben password Sales-BJ
    Amy Amy password Sales-BJ
    Shelly Shelly password Sales-BJ
    Bill Bill password QA-SH
    Sam Sam password QA-SH
    Chil Chil password QA-SH
    Frank Frank password Company-SH
    John John password Dev-SH
    Jack Jack password Dev-SH
    Tom Tom password Dev-SH
  4. The project list is as follows:
    Table 4. Project List
    Project Project Member Project Admin Role of Project Member
    DevProjectA-SH Jack, Frank, John,and Tom Jack Normal project member
    SalesProjectA-BJ Tomas, Ben,Amy, and Shelly Tomas Normal project member
  1. The admin creates an organizational tree.

    The admin creates the organizational tree on Private Cloud based on the organizational structure of the company.

    On the main menu of ZStack Cloud, choose Operational Management > Tenant Management > Personnel and Permissions > Organization. On the Organization page, click the plus sign to the right of Organization. Then, the Create Organization page is displayed.

    On the displayed page, set the following parameters:
    • Name: Enter a name for the organization.
    • Description: Optional. Enter a description for the organization.
    • Type: Choose the type of the organization. You can add a new team (by default) or add a subdepartment.
      Note: To add Subdepartment, you need to specify Upper Department from the subdepartment or new team that are already added.
    • Admin: Optional. Specify an appropriate user as the admin.
    • Department Manager: Optional. Specify a department manager for the new team to assist the admin to manage the department.
      Note:
      • A department manager is in charge of the operational management of the whole department, including project management, ticket approval, bill checks, and key resource monitoring.
      • A user cannot be specified as the department manager if the user is already attached to other roles.
      • A user cannot be attached to other roles if the user is specified as the department manager.
    • Quota Setting: The quota settings can be configured manually, and you can configure the quota settings for the following resources:
      • Compute Resource: including memory, and the number of VM instances, running VM instances, CPU, GPU devices, elastic baremetal instances, and VM scheduling polices.
      • Storage Resource: including the quantity of data volume, volume snapshot, available storage capacity, image, total image size, backup data, and available backup capacity.
      • Network Resource: including the quantity of VXLAN network, L3 network, security group, VIP, EIP, port forwarding, load balancer, and listener.
      • Other: including scheduled job, scheduler, resource alarm, event alarm, endpoint, and tag.
    Figure 1. Create Organization


    Take Table 1 for reference, repeat the steps above to complete the creation of the organization structure tree.

  2. The admin creates users and adds users to the corresponding organizational structure.
    On the main menu of ZStack Cloud, choose Operational Management > Tenant Management > Personnel and Permissions > User. On the User page, click Create User. The Create Organization page appears. Take Table 3 for reference, follow the steps below to batch create users via template import, and add the users to corresponding organizations.
    Note: In this scenario, the column of project can be left blank, while you can fill in the information such as description, Email address, phone number, and code as needed.
    Note:
    On the Create User page, select Template Import as the method to create a user. The detailed steps are as follows:
    1. Download the template.
      Click Download Template to download a template in the .csv format.
      Figure 2. Template


      Note: User name, name, and password are required parameters, and the user name must be globally unique.
    2. Fill in the configuration information of users according to the prescribed format.

      The user template includes a header and an example row, which needs to be deleted or overwritten when editing the template.

      On the template, set the following parameters:
      • Name: Enter a name for the user.
      • User Name: Enter the user name as an unique identifier for logging in to the Cloud.
      • Password: Set a user login password.
      • Description: Optional. Enter a description for the user.
      • Phone Number: Optional. Enter a phone number of the user.
      • Email Address: Optional. Enter an email address of the user.
      • Identifier: Optional. Enter a user ID, such as the job ID.
      • Organization: Optional. A user can be added to one or multiple organizations.
        Note:
        • The organization that you fill in has to be an existing organization. Note that organizations must be separated by /. For example: Company/Dev.
        • If the organization path duplicates, attach the UUID of a upper-department, such as Company(f11444d42701483791370e9f8b9300b9)/Dev.
        • If a user is added to multiple organizations simultaneously, separate these organizations by &&, such as Company/Dev&&Company/QA.
      • Project: Optional. A user can be added to one or multiple projects.
        Note:
        • The project that you fill in has to be an existing project. When a single project is added, enter the project name directly, such as project-01.
        • If a user is added to multiple projects simultaneously, separate these projects by &&, such as project-01&&project-02.
    3. After finishing the configurations in the template, you can directly upload the template to the Cloud by the browser. Confirm the template and click OK. The Cloud automatically creates users according to the uploaded template configuration file.
      Figure 3. Upload Template


  3. The admin specifies the department admin.

    Take Table 2 for reference, repeat the steps below to add the department admin for each department.

    On the Organization page, click Actions > Change Department Admin, and specify a user as the department admin.

  4. The admin shares basic resources globally.

    To ensure a smooth project, the basic resources needs to be globally shared, including disk offering, instance offering, images, and private networks/VXLAN Pool.

    Take the image as an example, on the Image page, choose one or more images, click Actions > Set Sharing Mode, and choose Share globally as the sharing mode.
    Figure 4. Share Resource Globally


    Repeat the operations above to share other basic resources globally.

  5. The admin creates a project and specifies the project admin.

    On the Project page, click Create Project. The Create Project page appears.

    On the displayed page, set the following parameters:
    • Name: Enter a name for the project.
    • Description: Optional. Enter a description for the project.
    • Project Configuration: You can choose manual or project template for the project configuration.
      If you choose Manual for the project configuration, set the following parameters:
      • Quota Setting: Specify quota settings to control the total resources in the project.
        • Compute Resource: including memory, and the number of VM instances, running VM instances, CPU, GPU devices, elastic baremetal instances, and VM scheduling polices.
        • Storage Resource: including the quantity of data volume, volume snapshot, available storage capacity, image, total image size, backup data, and available backup capacity. Notice that the Backup Service Plus License is required for the quota settings of backup data and available backup capacity.
        • Network Resource: including the quantity of VXLAN network, L3 network, security group, VIP, EIP, port forwarding, load balancer, and listener.
        • Other: including scheduled job, scheduler, resource alarm, event alarm, endpoint, and tag.
        Figure 5. Quota Setting


      If you choose Project Template for the project configuration, set the following parameters:
      • Project Template: If you choose the project template for the project configuration, you need to select an existing project template, which is used to directly apply the quota settings defined in that template for the project.
        Figure 6. Project Template


    • Zone: Specify a zone to which the project belongs, and a project can only belong to one zone.
    • Reclaim Policy: Default values: Unlimited. You can also select Reclaim by specifying time and Reclaim by specifying cost.
      • Unlimited::

        After you create a project, resources within the project will be in the enabled state by default.

      • Reclaim by specifying time:
        • When the expiration date for a project is less than 14 days, a project member will receive a project expiration reminder that the project is about to expire after logging in to the Cloud.
        • After the project expired, resources within the project will be reclaimed according to the specified reclaim policy.
        To reclaim by specifying time, you need to set the following parameters:
        • Deadline: Set a deadline for the project.
        • Reclaim Policy: Three reclaim policies are supported:
          • Disable Project Member Login: After the project is expired, all project members are prohibited from logging in to the project, and the resources (VM instances and VPC vRouters) in the project are still running normally.
          • Disable Project Member Login and Stop Project Resource: After a project is expired, all project members are prohibited from logging in to the project, and all the resources (VM instances and VPC vRouters) in the project are in the stopped state.
          • Delete Project: A project is deleted after expiration, and the project is in the Deleted status. All project members are prohibited from logging in to the project, and all the resources (VM instances and VPC vRouters) in the project are in the stopped state.
          Note: After the VPC vRouter in the project is stopped, the network services it provides will stop correspondingly, and VM instances cannot access the external network.
      • Reclaim by specifying cost

        A project is expired when the project total spending reaches the maximum limit. After the project is expired, the resources within the project will be reclaimed according to the specified reclaim policy.

        To reclaim by specifying cost, you need to set the following parameters:
        • Spending Limit: Set a spending limit for the project.
        • Reclaim Policy: Three reclaim policies are supported:
          • Disable Project Member Login: After the project is expired, all project members are prohibited from logging in to the project, and the resources (VM instances and VPC vRouters) in the project are still running normally.
          • Disable Project Member Login and Stop Project Resource: After the project is expired, all project members are prohibited from logging in to the project, and all the resources (VM instances and VPC vRouters) in the project are in the stopped state.
          • Delete Project: A project is deleted after expiration, and the project is in the Deleted status. All project members are prohibited from logging in to the project, and all the resources (VM instances and VPC vRouters) in the project are in the stopped state.
          Note: After the VPC vRouter in the project is stopped, the network services it provides will stop correspondingly, and VM instances cannot access the external network.
    • Access Control: Optional. You can specify whether to allow or prohibit project members to or from logging in to the project within a specified time period.
      If not set, the time for project members to login in to the project is unlimited. You can configure the access control by setting the login allowed time and login prohibited time.
      • Login Allowed Time: You can set the time when members in the project can log in to the project by day or week. After setting, the project members can log in to the project only during the login allowed time period.
      • Login Prohibited Time: You can set the time when members in the project cannot log in to the project by day or week. After setting, the project members cannot log in to the project during the login prohibited time period.
      Note:
      • If the time period you set is earlier than or includes the current platform time, the access control policy takes effect in the next time period.
      • If you apply both the reclaim policy and access control policy, the reclaim policy has a higher priority.
    • Project Admin: Optional. Assign a corresponding user as the project admin.
    • Member: Optional. Add relevant users into the project as project members
    • Department: Optional. Load the project to the department,and then the billing is made by departments.
    • Pricing List: Optional. Select the pricing list used by the project. If not specified, the default pricing list is applied.
    • Security Group Constraint: By default, the security group constraint is disabled. If you enable security group constraint, when a project member creates a VM instance, the VM instance must have one or more security groups attached.
      Note:
      • Before you can enable security group constraint for the project, make sure that the project security group quota is set to 1 or higher.
      • If you enable the security group constraint for the project, a default security group is created when the project is created.
      • You can use the Project Security Group Constraint setting in Global Setting to make the setting take effect globally. By default, the Project Security Group Constraint setting is disabled. If you enable the setting, projects are enabled the security group constraint by default when they are created.
      • Rule: Optional. If you enable the security group constraint for the project, you can directly set the rules of security group when you create the project, or set the rules later.

    In this scenario, refer to Table 4, and create DevProjectA-SH (ZONE-SH), SalesProjectA-BJ (ZONE-BJ) and specify relevant project admin. The content other than the Project Admin can be left blank currently.

  6. The project admin creates a custom role.

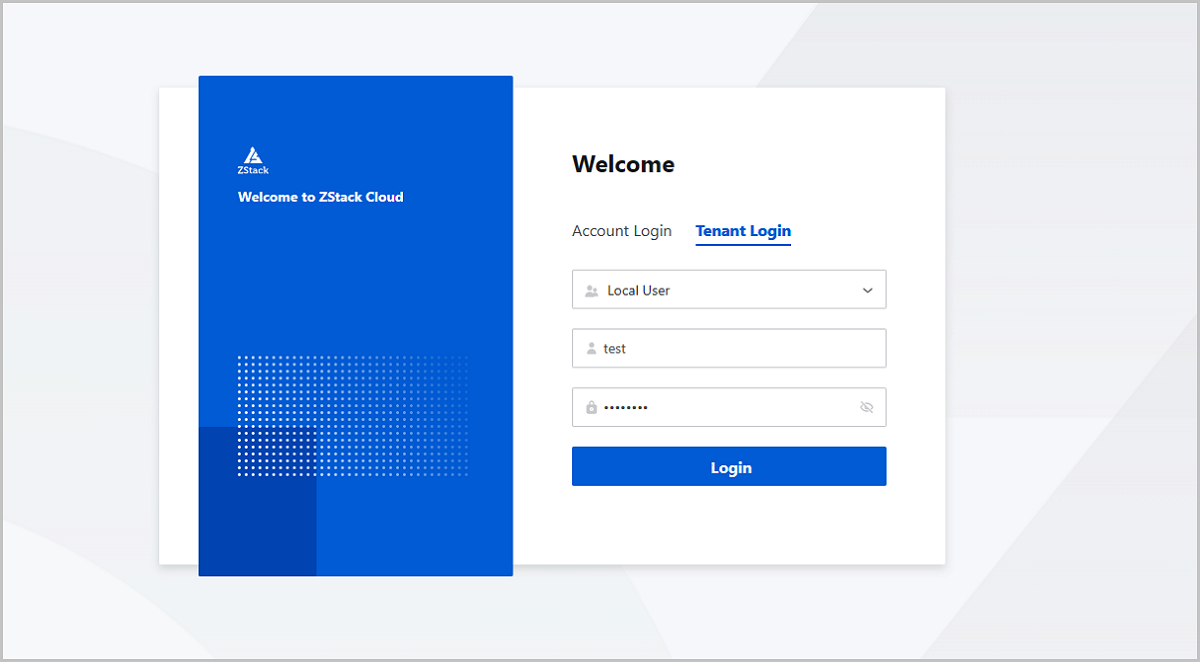
    By using Chrome or Firefox, the project admin can go to the Project Login page via http://management_node_ip:5000/#/project. To log in to the Cloud, the project admin must enter the corresponding user name and password.

    Figure 7. Tenant Login Page


    On the main menu of ZStack Cloud, choose Operational Management > Tenant Management > Personnel and Permissions > Role. On the Role page, click Create Role. The Create Role page appears.

    Project admins of different projects can refer to the steps above to create roles for the projects. Users can be granted regular project member permissions as needed.

  7. The project admin adds members and attaches roles to the project members.

    On Project page, choose the project, and click to enter its details page. Click Member > Add Project Member. You can refer to Table 4 to add project members and attach corresponding roles for them.

    Project admins of different projects can refer to the above steps to add members and attach roles to the project members.

  8. Log in to the Cloud.

    The users who have joined projects and have roles attached can log in to the Cloud to use resources on the platform, and also perform various actions. By using Chrome or Firefox, the project members are allowed go to the Project Login page via http://management_node_ip:5000/#/project. To log in to the Cloud, the project members must enter the corresponding user name and password.

    After the project members log in to the Cloud, all the projects to which they belong are displayed in the form of cards, then choose to enter project.

    Figure 8. Choose Project


The Quick Start Guide for Tenant Management is completed.

Custom Permissions: Network Admin

ZStack Cloud supports the API-level fine-grained permission control, which allows you to custom permissions for a user and meets your needs in different scenarios. This scenario takes an example of creating the role of network admin to introduce you the steps to custom permissions for a user.

The example use case is as follows:
  1. The admin creates a platform user named Jerry.
  2. The admin customs a platform role as a network admin.
  3. Attach the role of network admin to the platform user Jerry.

Assume the customer scenario as follows:

A company in Shanghai needs to create a role of network admin, who assists the admin to jointly manage the network resources on the Cloud, and has all permissions related to L2 network, L3 network, network services, and public network billings .
Table 1. List of Permissions for the Role of Network Admin
Permissions Remarks
Billing Management Operations Provides billing-related features, which is used for public network IP billing.
Backup Storage Operations Provides backup storage features, which is used to add the VPC vRouter image and create VPC vRouters.
Cluster Operations Provides cluster-related features, which can be functional only after the L2 network is attached to the cluster.
Image Operations Provides image-related features, which is used to add the VPC vRouter image and create VPC vRouters.
Instance Offering Operations Provides instance offering-related features, which is used to create instance offerings and create VPC vRouters.
L2 Network Operations Provides L2 network-related features, such as L2NoVlanNetwork, L2VlanNetwork, and VxlanNetwork.
L3 Network Operations Provides L3 network-related features, such as public network, flat network, and VPC network.
Network Service Operations Provides network service-related features, including security group, VIP, EIP, port forwarding, load balancing, SNAT, DHCP, and IPsec Tunnel.
OSPF Operations Provides OSPF dynamic routing-related features, which are used for VPC vRouters.
VPC vRouter Operations Provides features related to VPC vRouter and VPC network.
VM Instance Operations Provides VM instance-related features, which are used to create VPC vRouters.
VPC Operations Provides features related to VPC vRouter and VPC network.
Zone Operations Provides zone-related features. Network resources have the zone attributes, so they can be used only when they are attached to a specific zone or zones.
ZWatch Operations Provides alarm-related features, which are used for alarms related to vRouters, L3 network, and VIPs.
  1. The admin creates a platform user named Jerry.

    On the main menu of ZStack Cloud, choose Operational Management > Tenant Management > Personnel and Permissions > User. On the User page, click Create User. Then, the Create User page is displayed.

    On the Create User page, select Custom as the method of creating a user, and on the displayed page, set the following parameters:
    • Name: Enter a name for the user.
    • Description: Optional. Enter a description for the user.
    • User Name: Enter a user name, which is the unique identifier for logging in to the Cloud.
    • Password: Set the user login password.
    • Confirm Password: Enter the login password again.
    • Immediate Department: Optional. Users can be added directly to the corresponding department.
    • Phone Number: Optional. Enter user mobile number.
    • Email Address: Optional. Enter user email address.
    • Identifier: Optional. Enter the user ID, such as the job ID.
    • Platform Role: Optional. You can specify one or more platform roles for one user. You need to set the management zone for the use after the platform role is specified.
      Note:
      • After the platform role is attached to users, these users can have permissions to manage corresponding zones. The permissions of the platform role only take effect in the zone under the control of the user.
      • After the platform role is attached to users, these users need to log in to the Cloud via Project Login.
      • Management Zone: Specify the zone under the control of the platform role.
        Note:
        • After a zone is specified to users, these users can only manage the zones specified to them.
        • One platform role can manage a group of zones, while one zone can be co-managed by multiple platform roles.
    • Project: Optional. A user can be added to one or more projects.
      Note: After a user is bound to a project, this user will have corresponding permissions of the project, and manage corresponding data within the project.
    Click the OK button to create a platform user named Jerry.
    Figure 1. Create User


  2. The admin customs a platform role as a network admin.

    On the main menu of ZStack Cloud, choose Operational Management > Tenant Management > Personnel and Permissions > Role. On the Role page, click Create Role. The Create Role page appears.

    The three steps to create a role are as follows:
    1. Basic Info.
      On the displayed page, set the following parameters:
      • Name: Enter a name for the role.
      • Description: Optional. Enter a description for the Role.
      • Role Type: Choose the role type.
        Note: The role type of a network admin is platform user.
      • Root Role: Set the root role. The root role is used to limit the permission range of custom roles, whose permissions are inherited from the root role. Permissions of these custom roles are a subcollection of those of the root role.
      Figure 2. Configure Basic Info


    2. UI permissions.

      Select the module permissions and configure these UI permissions according to the permission list for network admin role above.

      Figure 3. Configure UI Permissions


    3. Preview.
      Check the role to be created, and you are allowed to modify the UI permissions as the figure shown as below:
      Figure 4. Preview


  3. Attach the role of network admin to the platform user Jerry.

    On the User page, choose the user Jerry, and click Actions > Modify Platform Role. On the Modify Platform Role page, click OK button to attach the role of network admin to the user named Jerry.

    Figure 5. Attach the Role of Network Admin to User


    After attaching the role of network admin to the user named Jerry, Jerry is assigned permissions related to network management that support all network-related operations, enabling him to assist the admin to jointly manage the network resources on the Cloud.


Back to Top

Download

Already filled the basic info?Click here.

Enter at least 2 characters.
Invalid mobile number.
Enter at least 4 characters.
Invalid email address.
Wrong code. Try again. Send Code Resend Code (60s)

An email with a verification code will be sent to you. Make sure the address you provided is valid and correct.

同意 不同意

I have read and concur with the Site TermsPrivacy PolicyRules and Conventions on User Management of ZStack Cloud

Download

Not filled the basic info yet? Click here.

Invalid email address or mobile number.
同意 不同意

I have read and concur with the Site TermsPrivacy PolicyRules and Conventions on User Management of ZStack Cloud

Email Us

contact@zstack.io
ZStack Training and Certification
Enter at least 2 characters.
Invalid mobile number.
Enter at least 4 characters.
Invalid email address.
Wrong code. Try again. Send Code Resend Code (60s)

同意 不同意

I have read and concur with the Site TermsPrivacy PolicyRules and Conventions on User Management of ZStack Cloud

Email Us

contact@zstack.io
Request Trial
Enter at least 2 characters.
Invalid mobile number.
Enter at least 4 characters.
Invalid email address.
Wrong code. Try again. Send Code Resend Code (60s)

同意 不同意

I have read and concur with the Site TermsPrivacy PolicyRules and Conventions on User Management of ZStack Cloud

Email Us

contact@zstack.io

The download link is sent to your email address.

If you don't see it, check your spam folder, subscription folder, or AD folder. After receiving the email, click the URL to download the documentation.

The download link is sent to your email address.

If you don't see it, check your spam folder, subscription folder, or AD folder.
Or click on the URL below. (For Internet Explorer, right-click the URL and save it.)

Thank you for using ZStack products and services.

Submit successfully.

We'll connect soon.

Thank you for using ZStack products and services.