- Account Home
- Language
- News
- Products
-
Cases
By ServiceBy Solution
- Help & Support
- Partners & Training
- About Us
- 立即下载
ZStack Cloud provides Java SDK and Python SDK supports. To use the corresponding features, call ZStack Cloud APIs by using the SDK method.
sdk dataformat: YY-MM-DD hh:mm:ss, such as 2019-03-08 19:23:00.Before you use Java SDK or Python SDK, prepare the following software tools:
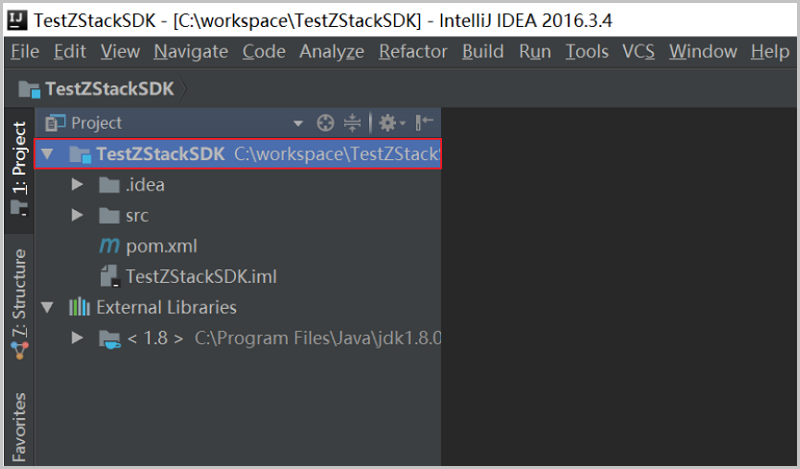
According to your own usage, download and install the appropriate Java development tool, such as IntelliJ IDEA and Eclipse, and complete the initialization job. This topic uses IntelliJ IDEA as an example.
Install the Java JDK tool in advance. We recommend that you use Java JDK 8.
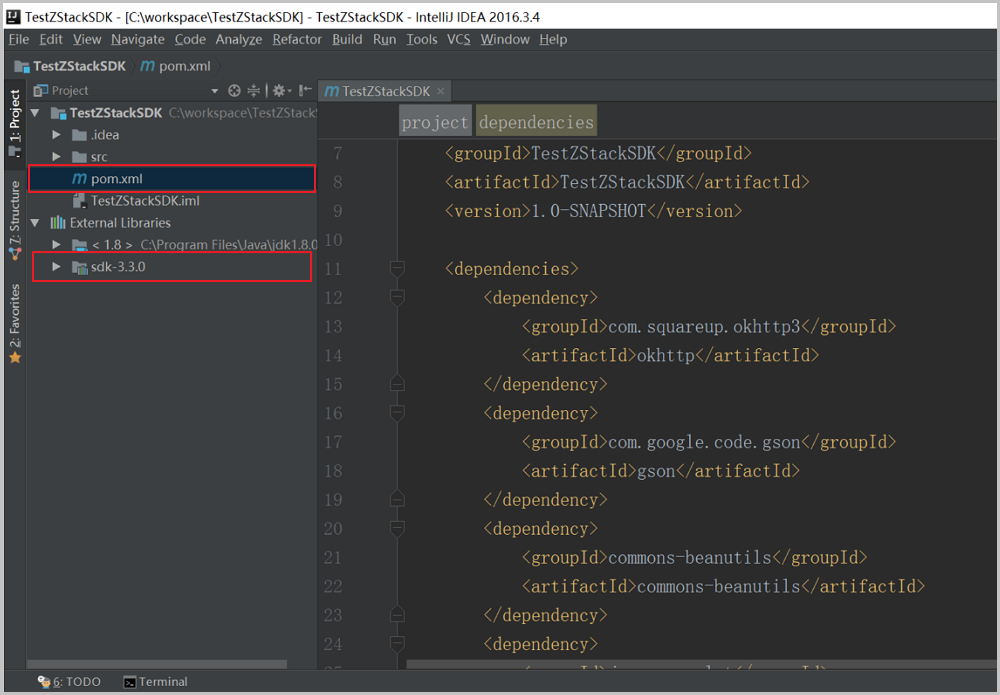
<dependencies> <dependency> <groupId>org.zstack</groupId> <artifactId>sdk</artifactId> <version>3.4.0</version> </dependency> <dependency> <groupId>com.squareup.okhttp3</groupId> <artifactId>okhttp</artifactId> <version>3.5.0</version> </dependency> <dependency> <groupId>com.google.code.gson</groupId> <artifactId>gson</artifactId> <version>2.1</version> </dependency> <dependency> <groupId>commons-beanutils</groupId> <artifactId>commons-beanutils</artifactId> <version>1.9.3</version> </dependency> <dependency> <groupId>javax.servlet</groupId> <artifactId>servlet-api</artifactId> <version>2.5</version> <scope>provided</scope> </dependency> <dependency> <groupId>commons-codec</groupId> <artifactId>commons-codec</artifactId> <version>1.9</version> </dependency> </dependencies>scp -r /var/lib/zstack/virtualenv/zstackcli $LocalHostIP:$VirtualDirectory //LocalHostIP is the IP address of the local PC and VirtualDirectory is the directory created in the local PC. Note: Make sure that the local PC is connected to the management node and is installed Python 2.
source /var/lib/zstack/virtualenv/zstackcli/bin/activatesource $VirtualDirectory/zstackcli/bin/activate //VirtualDirectory is the directory created in the local PC.export ZS_SERVER_IP=127.0.0.1export ZS_SERVER_IP=MN_IP //MN_IP is the IP address of the management node.After the preparations are completed, refer to the following procedure to use ZStack Cloud SDK:


This topic takes the query of a VM instance as an example to describe the usage of ZStack Cloud Java SDK and Python SDK.
package org.zstack; import org.zstack.sdk.*; import java.math.BigInteger; import java.security.MessageDigest; import java.security.NoSuchAlgorithmException; import java.util.List; import java.io.UnsupportedEncodingException; /** * Display how to use zstack Java SDK to check a VM list.*/ public class ZStackSDKDemo { public static void main(String[] args) { String zstackServerHostname = "Enter the IP address of zstack management node."; String accountName = "Enter zstack account."; String password = "Enter zstack account password."; ZSClient.configure( new ZSConfig.Builder() .setHostname(zstackServerHostname) .setPort(8080) .setContextPath("zstack") .build() ); String sessionId = getSessionByLoginAccount(accountName, password); QueryVmInstanceAction action = new QueryVmInstanceAction(); action.sessionId = sessionId; QueryVmInstanceAction.Result result = action.call(); result.throwExceptionIfError(); List<VmInstanceInventory> vmList = result.value.getInventories(); System.out.println(String.format("QueryVmInstanceAction action succeeded, and %s VM instances are detected.", vmList != null ? vmList.size() : 0)); } private static String getSessionByLoginAccount(String accountName, String password) { LogInByAccountAction action = new LogInByAccountAction(); action.accountName = accountName; action.password = encryptToSHA512(password); LogInByAccountAction.Result result = action.call(); result.throwExceptionIfError(); System.out.println("Login succeeded."); return result.value.getInventory().getUuid(); } private static String encryptToSHA512(String input) { try { MessageDigest md = MessageDigest.getInstance("SHA-512"); md.reset(); md.update(input.getBytes("utf8")); BigInteger bigInteger = new BigInteger(1, md.digest()); return String.format("%0128x", bigInteger); } catch (NoSuchAlgorithmException | UnsupportedEncodingException e) { throw new RuntimeException(e); } } }public static void main(String[] args) { String zstackServerHostname = "Enter the IP address of zstack management node."; String accountName = "Enter zstack account."; String password = "Enter zstack accnount password."; ZSClient.configure( new ZSConfig.Builder() .setHostname(zstackServerHostname) .setPort(8080) .setContextPath("zstack") .build() );QueryVmInstanceAction action = new QueryVmInstanceAction(); action.sessionId = sessionId; QueryVmInstanceAction.Result result = action.call(); result.throwExceptionIfError();import time import os import sys import traceback import hashlib import zstacklib.utils.log as log # comment out next line to print detail zstack cli http command to screen. log.configure_log('/var/log/zstack/zstack-sdk.log', log_to_console=False) import apibinding.api_actions as api_actions from apibinding import api import xml.etree.cElementTree as etree import apibinding.inventory as inventory zstack_server_ip = os.environ['ZS_SERVER_IP'] # Set the account name or username used to log into the Cloud. user_name = 'admin' # Set the password used to log into the Cloud. user_password = 'password' # Specify the UUID of the host where the VM instances running. host_uuid = 'acb492ce8cd640c8bb73bae75ea00adf' # Must keep. def sync_call(apiCmd, session_uuid): api_instance = api.Api(host=zstack_server_ip, port='8080') if session_uuid: api_instance.set_session_to_api_message(apiCmd, session_uuid) (name, reply) = api_instance.sync_call(apiCmd, ) if not reply.success: raise api.ApiError("Sync call at %s: [%s] meets error: %s." % ( zstack_server_ip, apiCmd.__class__.__name__, api.error_code_to_string(reply.error))) # print("[Sync call at %s]: [%s] Success" % (zstack_server_ip, apiCmd.__class__.__name__)) return reply # Must keep. def async_call(apiCmd, session_uuid): api_instance = api.Api(host=zstack_server_ip, port='8080') api_instance.set_session_to_api_message(apiCmd, session_uuid) (name, event) = api_instance.async_call_wait_for_complete(apiCmd) time.sleep(1) if not event.success: raise api.ApiError("Async call at %s: [%s] meets error: %s." % ( zstack_server_ip, apiCmd.__class__.__name__, api.error_code_to_string(reply.error))) # print("[Async call at %s]: [%s] Success" % (zstack_server_ip, apiCmd.__class__.__name__)) return event # Must keep. def login_as_admin(): accountName = user_name password = user_password return login_by_account(accountName, password) # Must keep. #tag::login_by_account[] def login_by_account(name, password, timeout=60000): login = api_actions.LogInByAccountAction() login.accountName = name # Login API will use encrypted password string. login.password = hashlib.sha512(password).hexdigest() login.timeout = timeout session_uuid = async_call(login, None).inventory.uuid return session_uuid #end::login_by_account[] # logout must be called after session isn't needed. # Must keep. #tag::logout[] def logout(session_uuid): logout = api_actions.LogOutAction() logout.timeout = 60000 logout.sessionUuid = session_uuid async_call(logout, session_uuid) #end::logout[] # Must keep. def execute_action_with_session(action, session_uuid, async=True): if session_uuid: action.sessionUuid = session_uuid if async: evt = async_call(action, session_uuid) else: evt = sync_call(action, session_uuid) else: session_uuid = login_as_admin() try: action.sessionUuid = session_uuid if async: evt = async_call(action, session_uuid) else: evt = sync_call(action, session_uuid) except Exception as e: traceback.print_exc(file=sys.stdout) raise e finally: # New login must be logout. If the active login session # exceed the limit, no account login is allowed. # The default active logined session limit is 500. logout(session_uuid) return evt # All Query API need conditions. This help to generate common conditions. # The op including: =, >, <, in, not in, like etc. def gen_query_conditions(name, op, value, conditions=[]): new_conditions = [{'name': name, 'op': op, 'value': value}] new_conditions.extend(conditions) return new_conditions #tag::query_zone[] def query_zone(conditions=[], session_uuid=None): action = api_actions.QueryZoneAction() action.timeout = 3000 action.conditions = conditions evt = execute_action_with_session(action, session_uuid) print 'Zone infomation: %s ' % evt.inventories return evt.inventories #end::query_zone[] def query_vm_by_host(host_uuid, conditions=[], session_uuid=None): action = api_actions.QueryVmInstanceAction() action.conditions = gen_query_conditions('hostUuid', '=', host_uuid, conditions) evt = execute_action_with_session(action, session_uuid) return evt.inventories if __name__ == '__main__': session_uuid = login_as_admin() vm_list = query_vm_by_host(host_uuid, session_uuid=session_uuid) for vm in vm_list: print 'Retrieved VM [uuid:%s]\n' % vm.uuid logout(session_uuid) Note: The system has predefined the maximum number of sessions that can be concurrently used to 500. You can modify the value in the global setting. If you call large numbers of login APIs in a short period of time while do not log out in time, once the session threshold is reached, you cannot use new sessions.
def login_by_account(name, password, timeout=60000): login = api_actions.LogInByAccountAction() login.accountName = name # Login API will use encrypted password string. login.password = hashlib.sha512(password).hexdigest() login.timeout = timeout session_uuid = async_call(login, None).inventory.uuid return session_uuid Note: The login password is encrypted by using the SHA-512 algorithm.
def logout(session_uuid): logout = api_actions.LogOutAction() logout.timeout = 60000 logout.sessionUuid = session_uuid async_call(logout, session_uuid)def query_zone(conditions=[], session_uuid=None): action = api_actions.QueryZoneAction() action.timeout = 3000 action.conditions = conditions evt = execute_action_with_session(action, session_uuid) print 'Zone infomation: %s ' % evt.inventories return evt.inventoriesaction.conditions = ["name=TestZone","state=Enabled"]. If you need to retrieve the information of all resources, you can specify an empty array. For more information, see Query API.The returned value of an API calling indicates the execution results of the API calling. For example, the returned result of a query API is evt.inventories, which is an array. You can use the count function to calculate the size of the array. For most non-query APIs, the returned result is JSON-formatted data. For example, the returned result of the API CreateVmInstanceAction is evt.inventory, which is an JSON object. For more information, see RESTful API Overview.
Back to Top
Email Us
contact@zstack.ioEmail Us
contact@zstack.ioEmail Us
contact@zstack.ioThe download link is sent to your email address.
If you don't see it, check your spam folder, subscription folder, or AD folder. After receiving the email, click the URL to download the documentation.Thank you for using ZStack products and services.
Submit successfully.
We'll connect soon.Thank you for using ZStack products and services.