Assume that you deployed a vCenter environment and the latest ZStack Private Cloud, and took over vCenter in ZStack Private Cloud. Due to business needs, you need to migrate VM instances from your vCenter to the current cloud.
Assume that you have purchased and installed the Migration Service module.
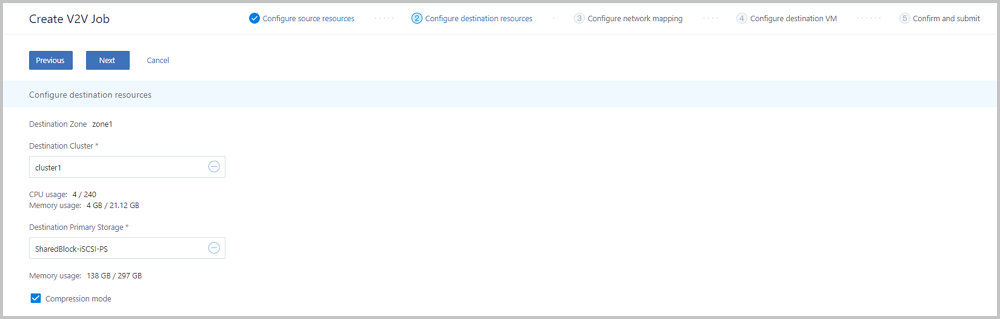
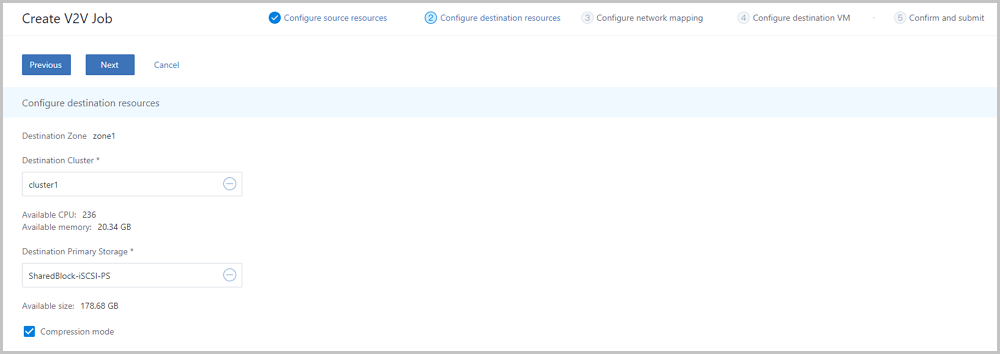
Before V2V migration, you need to specify a host in the destination cluster as the V2V conversion host. In this scenario, assume that you have prepared a storage server in advance and added the storage server to the destination cluster as a compute node. You use this compute node as the V2V conversion host.
| Source Cloud Platform | Destination Cloud Platform |
|---|---|
vCenter
| ZStack Private Cloud
|
In this scenario, you will add a compute node prepared in the destination cluster as the V2V conversion host.

In the navigation pane of the ZStack Private Cloud UI, choose . On the V2V Job page, click Create V2V Job. Then, the Create V2V Job page is displayed.
 Note:
Note: cmd-->“powercfg -h off”cmd-->“powercfg -h on”
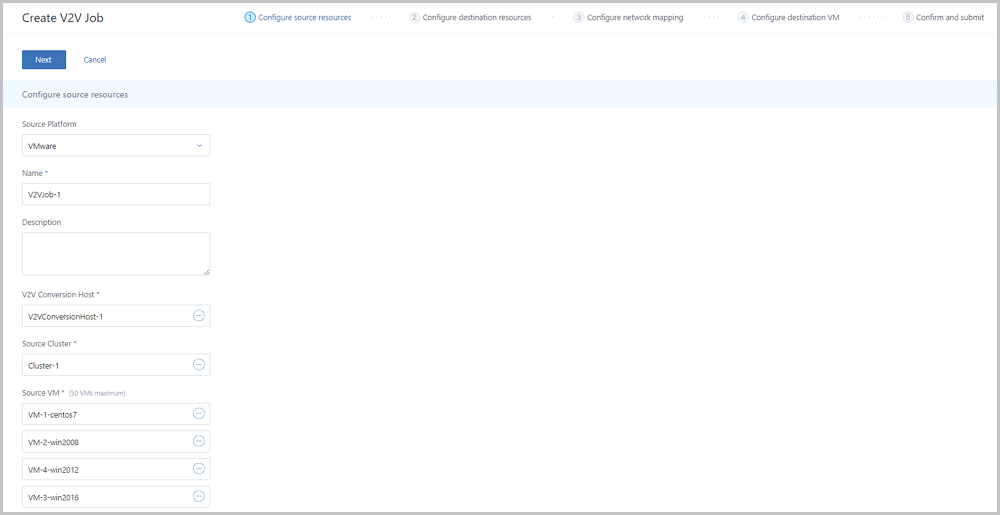
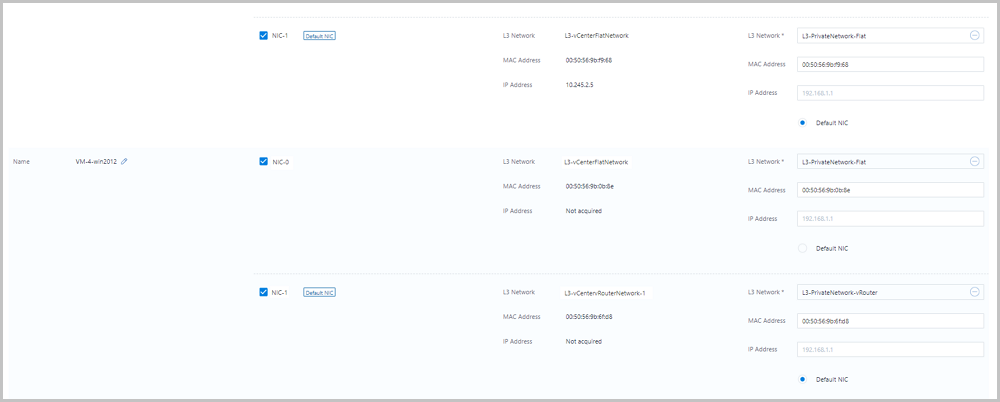
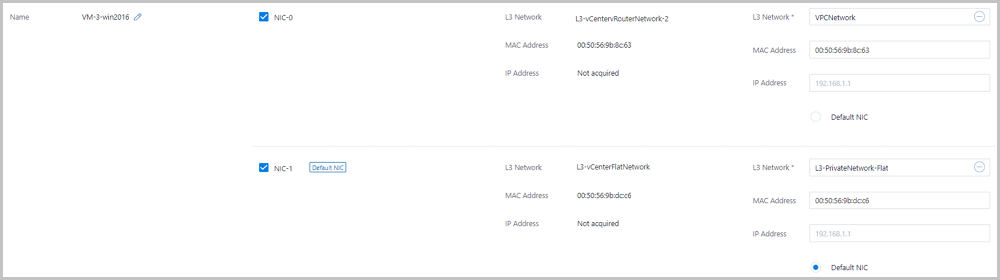
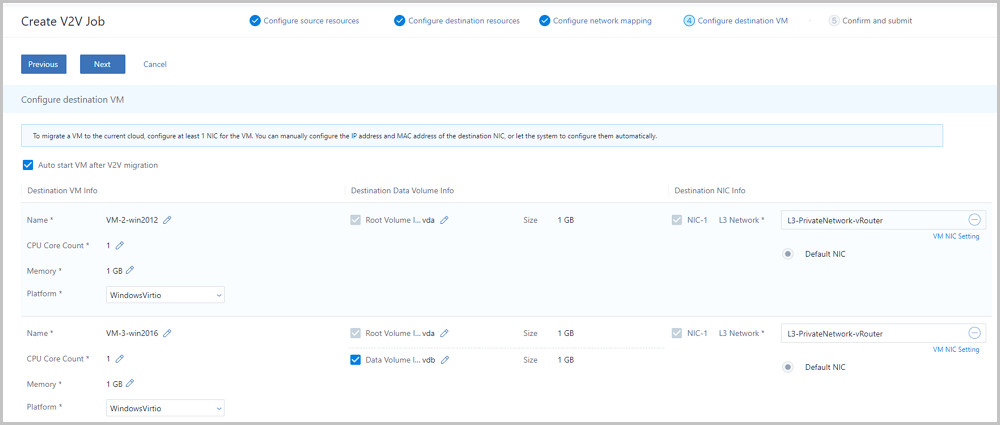
In this scenario, all the chosen VM instances have a NIC attached.
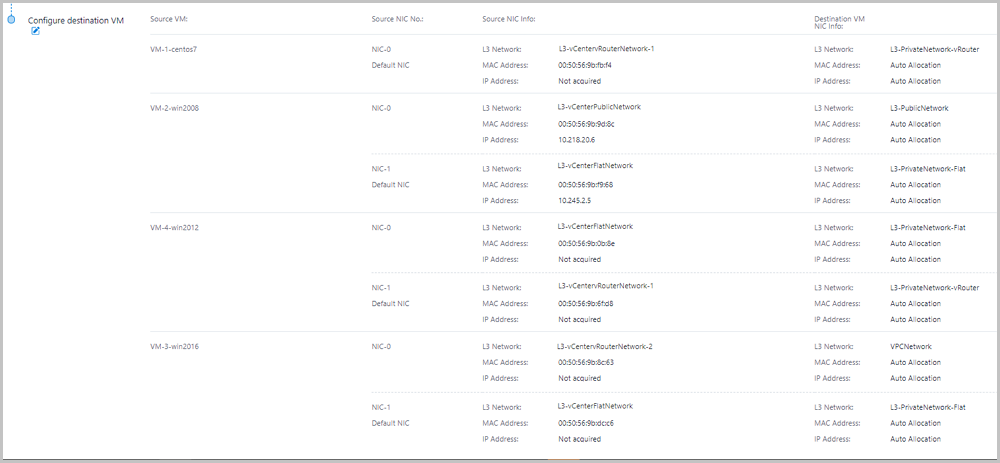
Go to the next step if no further modification is needed. Parameters of the destination VM instances are configured by the system by default.
Note: 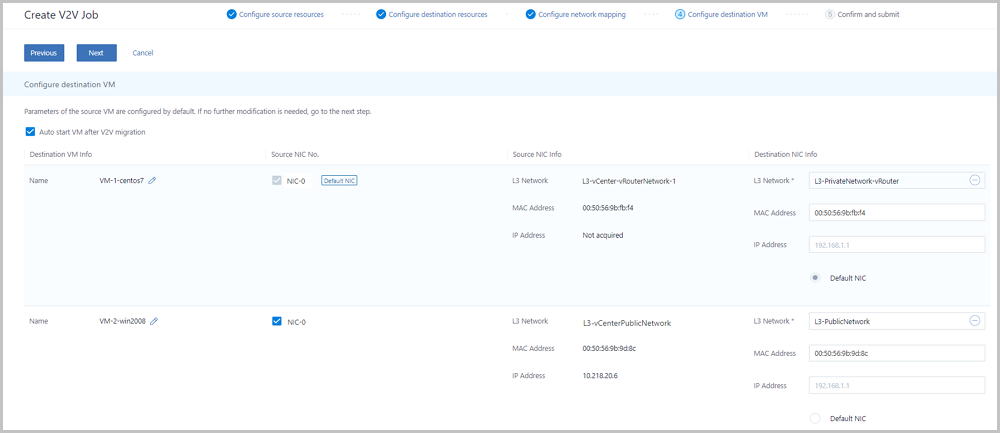
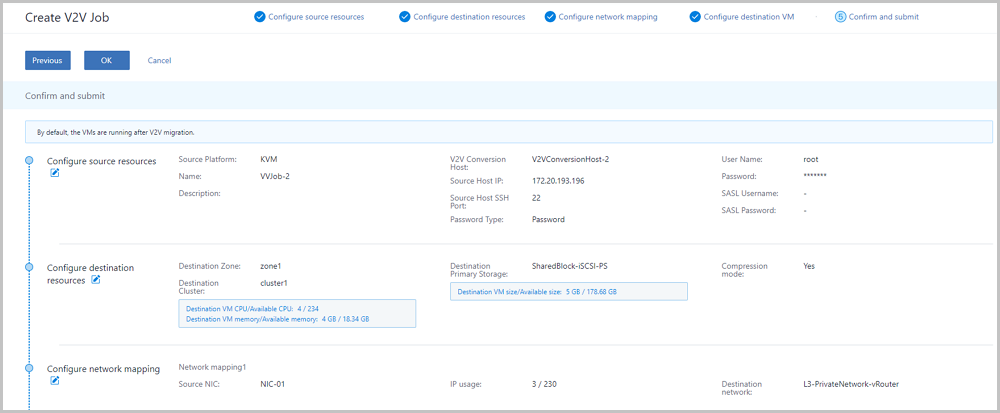
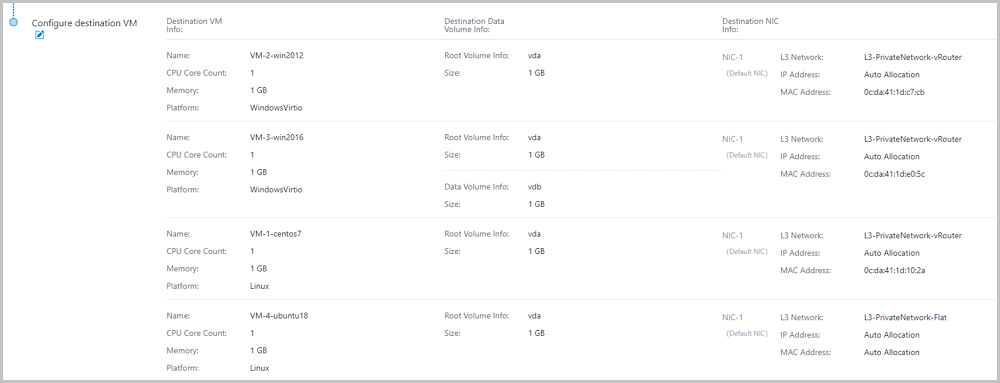
Confirm the information about the V2V job. You can modify the information by clicking the Edit icon next to each step.


Assume that you deployed an open source, KVM-based cloud environment and the latest ZStack Private Cloud. Due to business needs, you need to migrate VM instances from your KVM cloud platform to the current cloud
Assume that you have purchased and installed the Migration Service module.
Before V2V migration, you need to specify a host in the destination cluster as the V2V conversion host. In this scenario, assume that you have prepared a storage server in advance and added the storage server to the destination cluster as a compute node. You use this compute node as the V2V conversion host.
| Source Cloud Platform | Destination Cloud Platform |
|---|---|
An open-source, KVM-based cloud platform
| ZStack Private Cloud
|
In this scenario, you will add a compute node prepared in the destination cluster as the V2V conversion host.

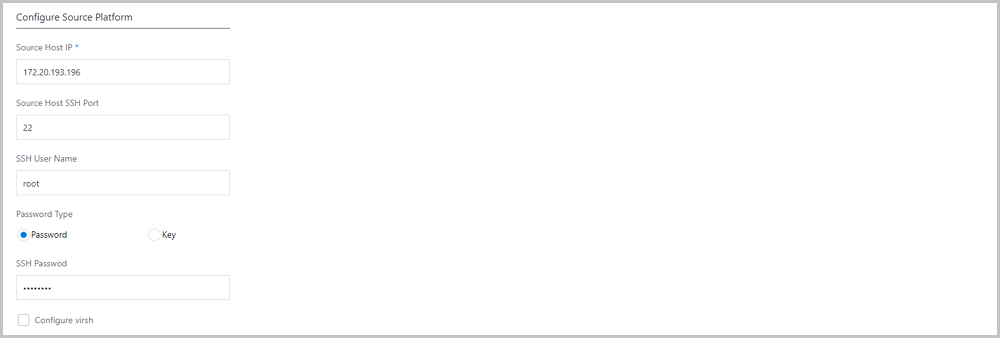
In the navigation pane of the ZStack Private Cloud UI, choose . On the V2V Job page, click Create V2V Job. Then, the Create V2V Job page is displayed.
Note: 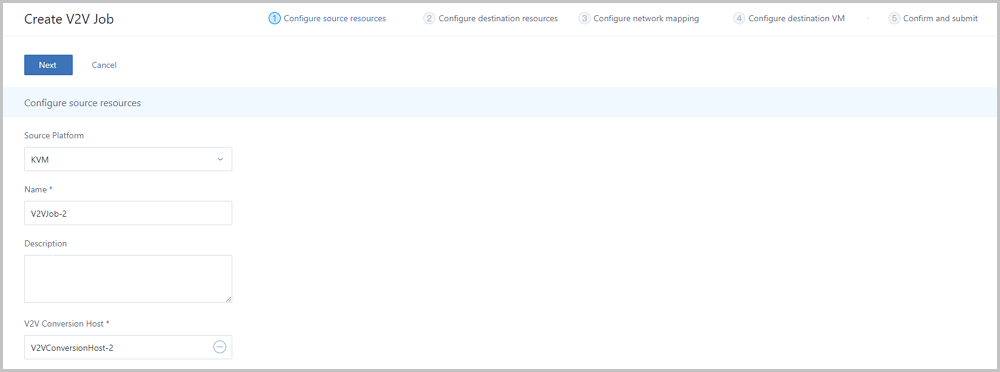
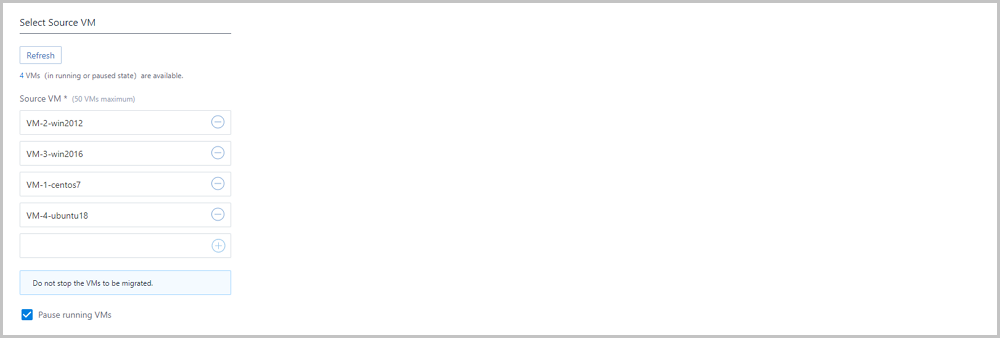
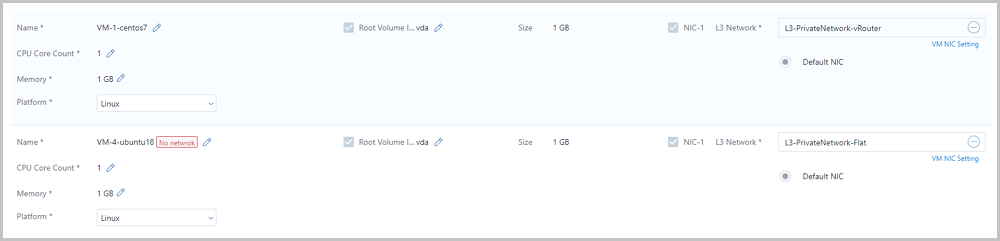
In this scenario, a chosen VM instance does not have a NIC attached.
Go to the next step to manually configure the destination NIC.
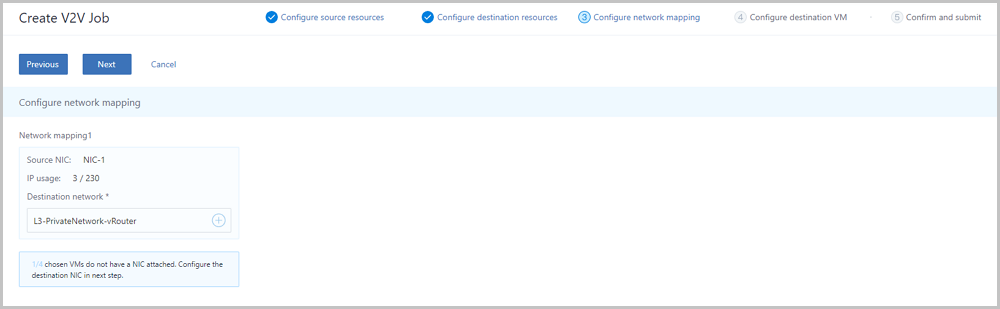 Note: Note:
 If No network is displayed next to the name of the source VM instance, you must manually configure the corresponding destination NIC.
Confirm the information about the V2V job. You can modify the information by clicking the Edit icon next to each step.

So far, we have described the example application scenarios of the V2V Migration Service.
© 2023, Shanghai Yunzhou Information and Technology Ltd (云轴科技). All Rights Reserved.
Back to Top
Email Us
contact@zstack.ioEmail Us
contact@zstack.ioEmail Us
contact@zstack.ioThe download link is sent to your email address.
If you don't see it, check your spam folder, subscription folder, or AD folder. After receiving the email, click the URL to download the documentation.Thank you for using ZStack products and services.
Submit successfully.
We'll connect soon.Thank you for using ZStack products and services.

